Skip to content

Schedule Post on Facebook App

Table of Contents

As a small business owner, you have realized how crucial it is to Schedule Post on Facebook App. Juggling the demands of your business, you often find yourself away from your laptop, and let’s be honest, using a laptop for social media tasks can sometimes feel tedious and limiting.

However, the convenience and flexibility of Facebook’s mobile app for scheduling posts have been a revelation. It aligns perfectly with the busy lifestyle of entrepreneurs and business owners.

In this guide, I’ll walk you through the ins and outs of efficiently using the Facebook app to schedule posts, whether you’re in the food industry, offer local services, or run a fitness center. These easy-to-follow strategies will simplify your social media routine, giving you more time for other key aspects of your business.

Before you Begin

First, you need to download Facebook’s Meta Business Suite Mobile Application from the Google Play Store for Android users or the Apple App Store for iPhone users.

How to Schedule Posts on Facebook Profile

Native app (Professional mode)

Tap the post creation tool to create a new post on Facebook Page.

1. Before scheduling a post, it is necessary to turn on the professional mode. To do so, open your Facebook profile and click on the three horizontal dots, on the immediate right side of the ‘Advertise’ option.

open Facebook profile page

2. Upon clicking on it, a pop-up window with various options will open, select ‘Turn on professional mode’.

turn on Professional mode

3. Once you do so, a new pop-up window with many features that come with professional mode will open. Browse through them if you’d like to, and whenever done, just click on ‘Turn on’ and your professional mode will turn on!

Professional mode is now turned on

4. Now, in order to create a new post, click on the “Write something here…” tab.

click on write something here

5. Upload all the videos, images, or texts that you’d like to add to the post, you can also add effects, stickers, and so much more. Upon being done with it, you can select Next.

add the media

6. Instead of clicking on Post, select the scheduling options in order to schedule the post.

scheduling options

7. Select the date and time that you’d like to schedule the post for.

select the date
select the time

8. After clicking on ‘OK‘, you’ll see the date and time that you’ve scheduled the post for, if you want to change, you can click on the ‘Schedule for later’ tab in order to edit the date and timings.

schedule for later

9. Once you’ve done so and are sure with the selected date and timings, click on Post and your post will be scheduled.

click on Post

How to schedule posts on Facebook Page

Native App:

1. Upon opening your Facebook page, towards the top, you’ll see a tab saying, What’s on your mind, it enables you to create a post.

Create a new post

2. Add in all the media that you’d like to include in the post, and once done, click on Next.

upload media

3. As you move forward, the post settings will appear with three different options, select ‘Scheduling Options‘ in order to schedule the post.

click on scheduling options

4. Choose the date and time for which you want to schedule the post at, and once done, simply click on ‘OK‘.

select the date

5. After putting in the necessary details for scheduling, select ‘Post‘ and your post will be scheduled.

schedule the post

Meta Business Suite:

Make sure that you have a professional or business account in order to use Meta Business Suite

1. Now you are all set to begin, to create a new post, click on the blue tab namely Create Post.

create post on facebook app

2. Confirm the placements you want to post to by tapping the drop-down menu. You can select your Facebook Page, Instagram account, or both (optional).

Confirm the placements

3. Create your post and tap Next.

  • You can post a text post, media (such as pictures or videos), links, and more.
  • Choose whether you want to publish on Facebook, Instagram, or both. Note that posts to Instagram must include media.
  • If you post to Instagram, feeling/activity and background colors are not supported.
Create your post and tap Next

4. To boost your post after it’s been published, tap the toggle next to Boost post. You can also boost Facebook posts while you’re creating your post by tapping Boost (optional).

5. Review your post and select an option:

  • To schedule your post to publish later, tap Schedule for later and select the time and date you want your post to go live.
  • To finish your post later, tap Save as draft.
Review your post

You can see your post on the date that it was scheduled to be published or has been published by going to Posts and Stories. Then tap on Calendar.

Note: These features are specific to Meta, you might not be able to access them on Facebook. To schedule posts, you must download Meta on your device and then use it.

How to Schedule Posts on Facebook groups

Native App:

1. Upon opening your Facebook account, click on the three horizontal lines on top right of the screen. 

Go to your Facebook profile

2. When you click on it, you will see multiple options. Among them all, click on groups.

Click on Groups

3. After you open ‘Groups’, you will see various categories in a line. Choose the third category on there titled, ‘Your groups’, and select any group from the sub-category ‘Groups you manage’.

Select the particular group

4.Upon opening that group, you’ll see a tab that says, “Write something…”.

click on 'write something'

5. After opening it, you will see three options highlighted in 3 different blue boxes namely: Public group, Schedule, AI label off.

You'll see three options

6. Once you click on Schedule, a tab from below will show up. Enter the necessary details and your post will be scheduled. Easy!

confirm the date and time

Note: These features are specific to Meta, you might not be able to access them on Facebook. To schedule posts, you must either have a business account on Facebook or download Meta on your device and then use it.

How to schedule a Facebook story

1. Open your Facebook and click on the ‘Story‘ option below ‘Create Post’ tab.

create a story

2. Here, you’ll see various media options and features that you can use, attach everything that you’d like to in order to create your story.

select the media that you'd like to add

3. In case any editing is required, like adding in music, filter or something like that, you can do it at this point of time.

Edit it if necessary

4. Post clicking on ‘Next‘, you’ll be redirected to a new page with the options to Publish now or Schedule for later, select the ‘Schedule for later’ option.

Click on 'schedule for later'

5. Carefully enter the time and date for when you want your post to go out, and once done, click on ‘Schedule‘.

Select the date and time

6. After the post is scheduled, you’ll be redirected to the Planner, where you can see your scheduled post.

You'll be redirected to Planner

7. If at this point of time, or anytime before the post is scheduled for being posted, you can make any edits to the post by clicking on the option of the three horizontal dots.

You can Reschedule the story, delete the story or publish right then

Note: The Facebook Native app does not yet have the feature to schedule a story, so Meta Business Suite can turn out to be your best shot in that area!

How to edit scheduled posts on Facebook app

What might seem to be just the perfect thing to schedule for posting in the near future, could start feeling sort of outdated or irrelevant as the scheduled date comes closer, couldn’t it? 

But you can heave a sigh of relief, because we’ve got you covered there! You can edit a scheduled post in no time now, keep reading to know how.

Native App:

1. To edit a scheduled post, go to your profile page and select the first option there in the first line, namely ‘Professional dashboard’.

Click on Professional mode

2. As you do so, you’ll be redirected to a new page with multiple options. However, in order to view or edit your scheduled post, simply scroll down.

Scroll down

3.Below Calendar, you’ll find the scheduled post under the date that you scheduled it for. On the far right corner of that very tab, you’ll see three consequent horizontal dots in a line.

View the calendar

4. In order to make any changes to your post, click on it and you’ll see the options to save, delete or edit it, do the needful and after making all the necessary changes, save it and that’s all!

Edit or delete the post if necessary

Meta Business Suite:

  1. Log in to your Facebook account ,then tap on your profile picture in the top right corner
tap on facebook profile picture
  1. Click on ‘see all profiles’, then select the page that you want to switch into.
see all facebook profiles
  1. Click your page’s profile picture in the top right, then click Meta Business Suite.
Click on Meta Business Suite
  1. Click on ‘planner’ in the next menu.
select facebook planner
  1. Find the post that you want to edit on the calendar and click it. You can toggle between viewing posts for the week or month in the top left.
Find your scheduled posts on facebook planner
  1. Then click on the 3 horizontal dots. From there, you can:
  • Edit post : Edit the text, media, link, or location of your post
  • Duplicate post : Make a copy of this post as a new post
  • Delete post : Delete the post
Edit the scheduled post

Note: If you wish to simply view your scheduled posts, you can go to your page and tap “Schedules posts”

Bonus Tip: Did you know you can save unfinished posts as drafts? Just tap “Save as Draft” before you schedule, and you can pick up where you left off later.

Common Mistakes to Avoid in Scheduling on Facebook App

Here are some common mobile scheduling mistakes to avoid, ensuring your social media presence stays fresh and engaging:

1. Over-Scheduling

You may be excited to share your amazing business, but bombarding your audience with non-stop posts can feel overwhelming. Aim for quality over quantity, spacing out your content to keep it exciting and relevant.

Solution: Utilize RecurPost’s separation of concerns method: This lets you first set your ideal social media posting schedule, creating “time slots” for different types of content. Then, you can create as much content as you want, but only content aligned with your pre-defined schedule will be automatically posted, preventing over-scheduling while maximizing content creation flexibility.

2. Ignoring Audience Feedback

Your audience is your compass! Pay attention to comments, reactions, and messages. Adapt your strategy if they’re requesting specific content or responding poorly to something.

Solution: Engage directly with your audience by responding to comments and taking feedback into account. Ask questions, run polls, and encourage interaction to understand their preferences.

3. Ignoring Different Time Zones

If you have customers or followers across different time zones, posting when they’re asleep won’t do much. Consider scheduling tools with time zone adjustments to maximize reach.

Solution: Utilize apps like RecurPost with multi-timezone scheduling features. Research your audience’s main locations and schedule posts for peak engagement times in those zones.

4. Neglecting Visuals

In the mobile world, eye-catching visuals reign supreme. Don’t just rely on text! Share high-quality photos, captivating videos, or eye-catching graphics to grab attention and engage your audience.

Solution: Invest in mobile-friendly editing tools or apps to enhance your pictures and videos. Use visual storytelling techniques to make your content stand out from the crowd.

5. Forgetting Hashtags

Hashtags are like magic keywords, helping potential customers discover your content. Choose relevant hashtags that align with your post and target audience to increase visibility.

Solution: Do your hashtag research! Tools like Hashtagify and Trends24 can help you identify trending and relevant hashtags for your niche. Use a mix of popular and niche hashtags to target both broad and specific audiences.

6. Inconsistent Posting

Disappearing for weeks and then suddenly bombarding your audience with posts is a recipe for confusion. Aim for a consistent posting schedule, even if it’s just a few times a week.

Solution: Create a content calendar with planned post dates and topics. Schedule your posts in advance to maintain consistency, even when you’re busy.

7. Scheduling “Spammy” Content

Avoid self-promotional overload! Nobody wants to feel bombarded with sales pitches. Offer valuable content, entertain, and inform your audience to build trust and engagement.

Solution: Focus on creating informative, entertaining, and helpful content that showcases your expertise or aligns with your audience’s interests. Share industry news, tips, behind-the-scenes glimpses, or even customer testimonials to keep your content fresh and valuable.

By steering clear of these common mistakes, your social media strategy can become more effective and rewarding. Now go forth and schedule with confidence!

Struggling with Facebook scheduled posts not working? Find out how to fix common issues and ensure your posts go live as planned. Learn more in our detailed guide here.

Why Schedule Posts on Facebook’s Mobile App?

You could find scheduling your Facebook posts as a futile activity if you are pretty active on Facebook. But scheduling posts is hands down one of the most useful tools, especially for small-business owners or start-ups who have limited resources and are attempting to manage multiple things at once, single-handedly. And the best part is, it is as easy as it is helpful! Some of the many benefits of scheduling are as follows:-

1. Consistent posting: Consistent posting can be tricky business, if the gap between posts is far too long, the audience might lose touch and interest. And sometimes posting manually on a regular basis becomes difficult, which is when the feature of scheduling posts sweeps in as a saving grace!

2. Timely audience outreach: The benefits of reaching out to the audience at optimal times is not a secret anymore, anyone who is active on social media is aware of it, and scheduling posts according to timings when the reach is maximum can really boost an account’s growth.

3. Time Management: It can be challenging to post with the intensity that is crucial, especially for small-business owners who handle too many tasks at a time. This tool can be a blessing in disguise for such people, and save so much time and energy!

4. Improved engagement: When the posts get uploaded regularly, the engagement also increases slowly and gradually, as people start trusting and looking forward to the account more. More than increasing posts on the page, scheduling helps increase engagement when used well.

Best Practices for Content Scheduling on Facebook App

To optimize your social media strategy, consider these best practices for scheduling content via mobile apps:

1. Optimize for Mobile Viewing

Remember, most people consume social media on their phones. Prioritize crisp visuals, concise captions, and easy-to-read fonts to provide a seamless mobile experience. Utilize apps with mobile-friendly editing tools to enhance your content for smaller screens.

2. Use Mobile-Friendly Scheduling Apps

Choose scheduling apps with user-friendly interfaces designed for the mobile experience. Look for features like drag-and-drop scheduling, intuitive post-creation tools, and quick previews to make managing your content on the go a breeze.

3. Keep Track of Scheduled Posts

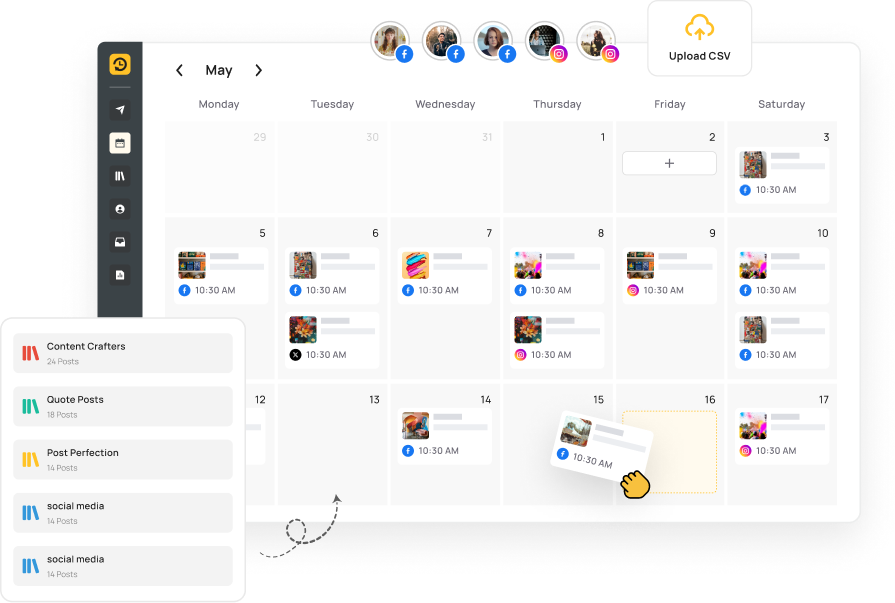
Don’t just schedule and forget! Regularly review your upcoming posts, checking for relevance and adjusting captions or visuals as needed. Utilize the calendar view in Facebook’s native scheduler or in third-party apps to monitor your content pipeline.

4. Quick Edits on the Go

Life happens, and sometimes your scheduled post might need a tweak. Choose apps that allow quick edits on the go, like changing captions, updating hashtags, or even swapping visuals, all from your phone.

5. Stay Updated with App Updates

Don’t be afraid to explore new features and updates in scheduling apps. They often bring valuable improvements like advanced analytics, automated optimization tools, or integrated collaboration features. Stay in the loop to unlock your app’s full potential.

6. Prepare for Connectivity Issues

Let’s face it, sometimes the internet throws us curveballs. Make sure you can still manage your posts even when offline. Some apps allow drafting and scheduling content while disconnected, so you can hit “publish” as soon as the signal returns.

By following these strategies, you can leverage the full potential of mobile scheduling to enhance engagement and streamline your social media management.

Conclusion

Embracing mobile scheduling for Facebook posts is a powerful tool for business owners, especially when considering how to post on Facebook efficiently. It aligns perfectly with the demands of a modern entrepreneur’s lifestyle, offering flexibility and efficiency.

As we’ve seen, small business owners can take advantage of the post-scheduling features within Facebook’s mobile app. They can easily schedule relevant articles while away from their desks, making use of periods of free time. I encourage you to explore these strategies, leverage the convenience of mobile apps, and see how they transform your approach to social media management.

Frequently Asked Questions

Can I schedule posts on my Facebook mobile app?

Absolutely! Scheduling posts on the Facebook mobile app is quick and easy. Whether you’re using Android or iOS, you can create captivating text posts, share stunning photos and videos, or even schedule live events straight from your phone.

How do I edit a scheduled post on the Facebook app?

Open the Facebook app and navigate to “Posts & Stories.” Then, tap on the “Calendar” icon and scroll to find your scheduled post. Click on the three dots next to the post and select “Edit Post” to update your text, visuals, or scheduling details.

How can I avoid common mistakes when scheduling a post through mobile?

Over-scheduling, ignoring audience feedback, neglecting visuals, and forgetting hashtags are common pitfalls. To avoid them, plan a content calendar, engage with your audience, use eye-catching visuals, and choose relevant hashtags. For further details, refer to the “Common Mistakes to Avoid in Scheduling” section of this guide.

Can you schedule posts on Facebook from your Android phone?

Yes! You can schedule posts on Facebook from your Android and iOS devices. The steps are slightly different for each platform, but this guide provides detailed instructions for both versions.

How far in advance can I schedule Facebook posts from the app?

You can schedule Facebook posts from the app up to six months in advance! This gives you plenty of flexibility to plan your content strategy and stay ahead of the game.

What types of content can I schedule other than text on Facebook App?

You can schedule various content types through the Facebook mobile app, including Text posts with captivating captions, Eye-catching photos, and videos, Live events to connect with your audience in real-time, Links to articles or websites you find interesting, and Stories to share fleeting moments and updates.

Where is the schedule button on the Facebook App?

The location of the schedule button depends on whether you’re using Android or iOS:
Android: After creating your post, tap the clock icon next to the “Post” button.
iOS: Look for the calendar icon next to the “Share” button after crafting your post.

How to schedule reels on Facebook?

You can schedule reels on Facebook ahead of time using Meta Business Suite or third-party tools like RecurPost. The procedure is the same as scheduling any post on Facebook.

Saurabh Chaturvedi is a content writer at RecurPost. Specializing in social media management and marketing, Saurabh is dedicated to crafting engaging and informative articles. His passion for clear, exciting content keeps readers eager for more.

Try
RecurPost

Schedule and Publish your posts on multiple social accounts, read and reply to incoming messages with social inbox, and collaborate with your team and clients with ease.