As a small business owner, you know how valuable yet challenging an effective social media presence can be. Between actually running your business operations and serving customers, finding the time to create quality content or scheduling reels on Facebook is easier said than done. This leads most entrepreneurs like yourself to search for solutions that provide maximum marketing impact with minimal effort.
Enter Facebook Reels—short, catchy video clips perfect for showcasing products, telling brand stories, and engaging your target demographic. The issue? Having to manually log in and post engaging Reels takes precious time small business owners lack.
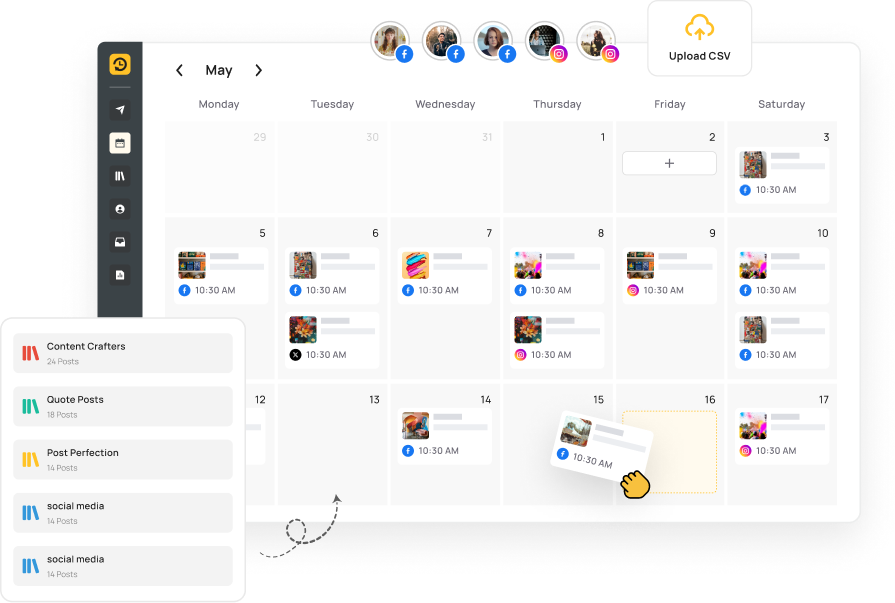
The good news? You can schedule reels ahead of time on Facebook using Meta Business Suite or third-party tools like RecurPost. This allows small businesses to set up engaging video content in advance and maintain a consistent presence that drives awareness and sales. There is no need to post reels on scheduled days amidst your other responsibilities manually.
This article will explore the value of scheduled reels for time-crunched business owners like you and provide actionable guidance on planning your video marketing. Let’s dive in!
How to schedule reels on Facebook app
To schedule a reel from Facebook app, you can follow the following steps:
1. At the outset, open your Facebook application and click on the tab saying, “What’s on your mind” to create a new reel.
2. Select the video that you’d like to use to create the reel, add text and anything else that you’d like to add in.
3. After completing the editing of the reel, as you click on Next, you’ll see the Post Settings and of all the settings, select the Scheduling options.
4. Select the time and place that you’d like to schedule the reel for, and once done click on OK when you are done.
5. Thereafter, you’ll view the date and time that you’ve selected below the Schedule for later option.
6. Once you’ve finalized the timings of scheduling, click on Post and the reel will be scheduled.
How to edit the scheduled reels on Facebook app
You sure can schedule Facebook Reels through Meta Business Suite, and in a more straightforward way. Let’s walk through the process:
1. Upon opening your Facebook page, navigate to your Facebook profile.
2. Among all the other options, select the option of Professional Dashboard.
3. Upon opening it, you’ll find multiple posts and reels insights, simply scroll down to reach the Content Calendar.
4. Under the date that you’ve scheduled the reel for, you’ll see the scheduled reel. And next to it, on the right-hand side of the that tab, you’ll see 3 succeeding parallel dots.
5. As you click on it, you’ll see multiple options like delete, edit, or save the post, along with many others. You can choose any option according to the kind of changes that you’d like to see in the scheduled reel.
How to schedule reels on Meta Business Suite app
You sure can schedule Facebook Reels through Meta Business Suite, and in a more straightforward way. Let’s walk through the process:
1. To begin with, log in to your Facebook account and head to Meta Business Suite. Once there, click on the tab ‘Create Reel’.
2. Once done, add the media or video that you’d like to create a reel of and add any stickers, effects, text or audio that you’d like to add to.
3. After completing the creation and editing of the reel, a new window will open and you’ll see the option to publish now, or schedule for later, select schedule for later.
4. Select the time and place that you’d like to schedule the reel. And once chosen, click on Schedule.
5. Following the same, click on ‘Schedule reel‘, and the reel will be scheduled.
6. After the post has been scheduled, if you want to view the reel, you can go to Planner and you’ll find it there under the date that you’ve scheduled it for.
How to schedule reels on Meta Business Suite Desktop
You sure can schedule Facebook Reels through Meta Business Suite web, and in a more straightforward way. Let’s walk through the process:
1. Access Meta Business Suite: Log in to your Facebook account and navigate to Meta Business Suite. Select ‘Create Reel’.
2. Upload and Write a Caption: Add your video, write a captivating caption, and add relevant hashtags.
3. Choose Thumbnail and Add Collaborators: Choose the suggested or custom thumbnail, and you can also add collaborators.
4. Edit your Video: You can add audio and text to your video, and you can also crop and trim your video to under 90 seconds.
5. Schedule Your Reel: Choose ‘Schedule Post’, select the date and time, and hit ‘Schedule’.
Remember, Meta Business Suite is a powerful tool that allows small businesses to maintain a consistent social media presence without daily manual intervention.
Is Facebook failing to schedule your posts properly? Learn how to troubleshoot and fix these issues with our step-by-step guide. Discover the solutions here.
How to edit a scheduled reel on Meta Business Suite
Many a time, after scheduling a post, one may continue to feel the scheduled reel to be worthy of editing or not ready to go out on the scheduled date. But all thanks to the increasing features of social media platforms, you can edit a scheduled reel as well on Meta Business Suite by going by the following steps on Meta Business Suite:
1. Post opening Meta Business Suite, you can navigate to the Planner, through the multiple options tab on the extreme left side.
2. Under the date that the reel has been scheduled for, you’ll find the scheduled reel. After you click on it, a new pop-up window will open.
3. On the top right-hand side of the pop-up window, you’ll see 3 consecutive horizontal dots. After you click on it, you’ll see multiple options for that reel namely, Edit reel, Reschedule reel, Move to drafts, and Delete reel. You can select any option that is applicable in your situation.
How to upload bulk reels on Facebook through Meta Business Suite Desktop
You can schedule not just one but multiple reels together through Meta Business Suite web by adhering to the following steps :
1. To begin with, you can open the Meta Business Suite in order to bulk upload on Facebook, and select the ‘More‘ option, next to the ‘Go Live‘ option.
2. As you do so, you’ll see four options, namely create ads, post video across pages, bulk upload reels and bulk upload videos. Select the bulk upload reels option.
3. In the course of doing that, a new window will open where you can upload all the videos that you want to create the reels of. You can add up to 50 reels together.
4. Right next to the Caption tab is the option to Publish now, but if you click on it, you’ll see two more options of Schedule and Save as draft; select Schedule.
5. You can select the date and time that you want to schedule all the reels at, you can also schedule all these reels for different timings too.
You can also schedule Facebook and Instagram reels simultaneously through cross-platform scheduling. And if you can’t schedule posts on Facebook, you can explore the challenges and solutions for the same.
Why Schedule Facebook Reels? Making the Most of Your Time
Small businesses can gain tremendous value from using Facebook Reels to engage their existing customers and nurture new leads. The issue often comes down to finding time in your busy schedule to post Reels while managing your broader operations. This leads to an inconsistent presence where you’re constantly playing catch-up.
This is where scheduling your video marketing ahead of time pays major dividends:
- Time Savings: Planning reels free up more bandwidth by focusing on high-value tasks like servicing clients. You save hours otherwise spent on content creation.
- Consistency: Maintain a steady video presence by planning regular reels during your busiest periods.
- Better Engagement: When followers are active, well-timed evergreen reels allow you to maximize visibility and performance. Curating your best niche content improves click-through rates over random manual posting.
- Enhanced Branding: Consistent video reinforces what your brand stands for in followers’ minds better than irregular posts ever could. Build familiarity and trust that pay off in sales.
Alongside scheduling Reels, creating engagement posts for Facebook is integral to building a strong, interactive online community for your business.
Better Engagement: When followers are active, well-timed evergreen reels allow you to maximize visibility and performance. Curating your best niche content improves click-through rates over random manual posting. To further enhance your results, understanding how Facebook’s algorithm prioritizes content can be a game changer. Learn more in our guide on How Facebook Algorithm Works.
While scrolling through their social media feeds, users may encounter both Facebook Reels and Instagram Reels, leading to a natural question: are these two platforms essentially the same, or do they offer distinct features and experiences?
Finding Your Best Audience Fit: Facebook Reels vs Instagram Reels
With short-form videos continuing to take social media by storm, some small business owners may need clarification about whether to create content for Facebook Reels or Instagram Reels. Which platform offers the biggest opportunity? While there is overlap, understanding some key differences between the two can help optimize your strategy across apps.
- Reach: Facebook Reels have a larger potential reach than Instagram Reels, as they can be seen by anyone on the Facebook platform, regardless of whether or not they follow the business that posted them. On the other hand, Instagram Reels are primarily seen by users who follow the businesses that posted them.
- Content Focus: Facebook Reels tend to be more focused on business promotion and brand storytelling, while Instagram Reels are more often used for personal expression and creative storytelling.
- Audience Demographics: Facebook Reels tend to attract a slightly older demographic than Instagram Reels, with a higher proportion of users over the age of 29.
Here is a table summarizing the key differences between Facebook Reels and Instagram Reels:
Feature | Facebook Reels | Instagram Reels |
Reach | Wider potential reach | Primarily seen by followers |
Content Focus | Business promotion and brand storytelling | Personal expression and creative storytelling |
Audience demographics | Older demographic (higher proportion of users over age 29) | Younger demographic |
Understanding how to schedule Facebook posts effectively, including engaging Reels, is vital for time-strapped entrepreneurs.
In summary, Facebook Reels allow precise engagement with your confirmed site visitors and followers. Instagram offers a wider general audience, especially for viral entertainment content. The use case differs slightly depending on your goals!
Now that you’ve grasped the benefits of scheduling Facebook Reels, let’s delve into the practical steps involved. Two popular and user-friendly options stand out: Meta Business Suite and RecurPost. Each platform offers a unique approach to scheduling Reels.
Scheduling with RecurPost
Scheduling Facebook Reels with RecurPost is another efficient option. Let’s cover how to get set up:
a. Setting Up Your RecurPost Account (One-Time Process)
1. Sign up for a RecurPost account (free or paid tiers available).
2. Complete your Profile: Provide your company name in your Profile, describe the company, and how many social profiles you are going to manage.
3. Connect Your Facebook Account: Link your Facebook pages, groups, and personal profiles to RecurPost.
RecurPost is a fantastic tool for managing your social media presence efficiently. With it, you can seamlessly schedule posts across various platforms like Facebook pages, groups, and even personal profiles.
One of its standout features is the ability to schedule Facebook group posts effortlessly. This means you can plan and schedule your group content in advance, ensuring consistent engagement without the hassle of manually posting each time.
To get started, simply link your Facebook pages, groups, and personal profiles to RecurPost. Once connected, you’ll have the power to schedule your posts strategically, maximizing your reach and impact.
With the RecurPost account setup and social accounts linked, you’re ready to start scheduling Reels!
b. Scheduling a Reel with RecurPost
1. Log In to RecurPost: Start by accessing your RecurPost account to begin the scheduling process.
- Log In to RecurPost
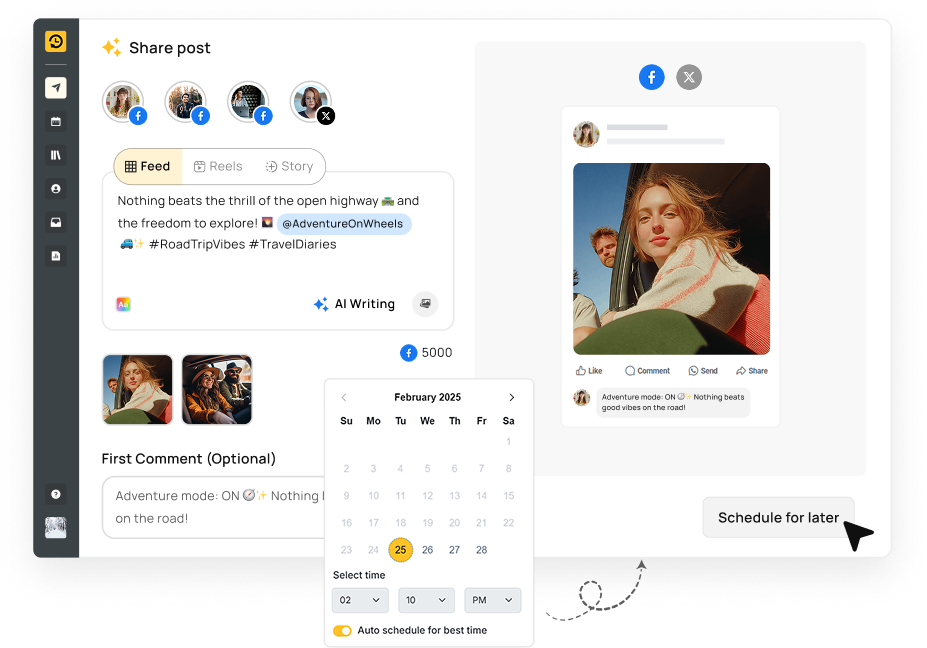
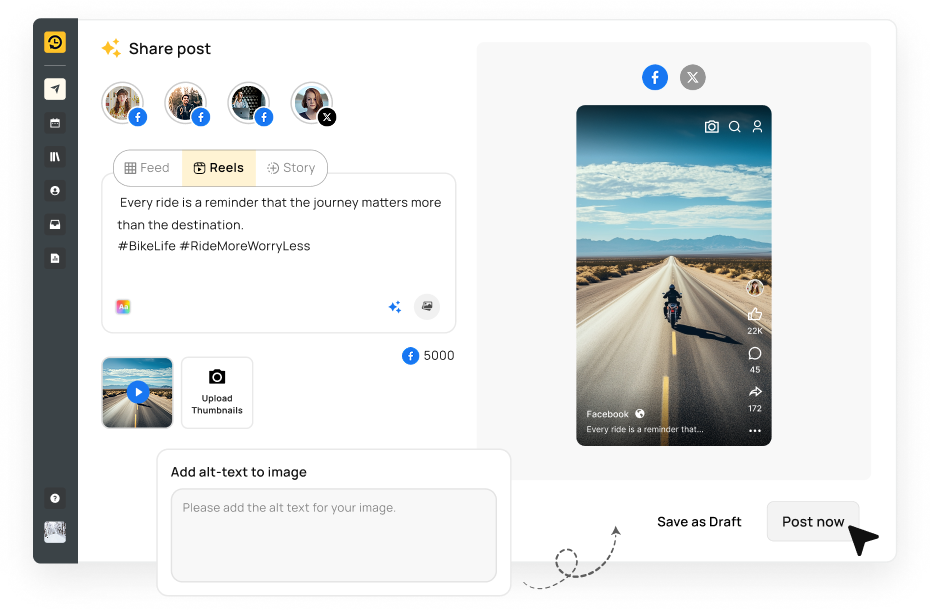
2. Create or Upload Your Reel: Navigate to the section where you can select your social accounts. Here, upload your video, ensuring you enrich it with engaging captions, emoticons and relevant hashtags to capture your audience’s attention.
- Create or Upload your Reel
Note: Make sure your video maintains a 9:16 aspect ratio to qualify as a Reel. Otherwise, it will be posted as a regular video.
3. Post Options and Scheduling:
- Select Post Type: Choose where you want your content to appear—select “Reels” to utilize Facebook’s dynamic format or “Feed” for traditional video posts.
- Confirm and Schedule: Once your Reel is ready, review your content and settings. Click ‘Schedule’ to set your Reel to go live at the desired time.
- Confirm and Schedule
RecurPost offers an intuitive interface, making it an excellent tool for small business owners and marketers aiming to enhance their social media presence efficiently.
Also, check out – How to Schedule a Facebook Live
Reels Scheduling: Comparing Meta Business Suite and RecurPost
When deciding how to schedule your Facebook Reels, you have the choice between Meta’s own Business Suite or a Facebook post scheduler like RecurPost. Which solution should small businesses invest in? Here’s an at-a-glance comparison:
Feature | Meta Business Suite | RecurPost |
Cost | Free to use | Free plan available. Paid tiers for more functionality |
No. of Connected Accounts | Can only manage Facebook and Instagram | Supports Facebook, Instagram, LinkedIn, Twitter, Pinterest, Google Business Profile, TikTok, YouTube, and more |
Schedule on | Only Pages | Can schedule on Pages, Groups, and Personal Profiles (through push notification) |
Scheduling Options | One-time and can be saved as a draft | Additional options, like recurring post |
Analytics Reporting | Robust Facebook Insights | Advanced analytics across multiple channels |
Content Libraries | No library capability | Library for storing evergreen content |
As highlighted in the table above, while Meta Business Suite provides the convenience of integrated Facebook management, third-party tools like RecurPost offer superior scheduling and analytics capabilities. The tradeoff for the added functionality is the software subscription pricing.
Ultimately, for time- and budget-restricted small business owners, RecurPost delivers efficient multi-channel content scheduling and performance tracking, which is extremely useful for owners handling their social media marketing! Try out RecurPost’s 14 day-free plan to experience the benefits firsthand.
The Analytics of Scheduled Facebook Reels
After scheduling your Facebook Reels, it’s crucial to track their performance. Facebook’s Meta Business Suite offers comprehensive Facebook analytics, enabling you to fine-tune your strategy based on concrete data. Here’s what you can expect:
- Detailed Reel Insights: View counts, average watch time, and audience retention metrics.
- Source Tracking: Understand where your traffic is coming from.
- Engagement Analysis: Monitor likes, comments, shares, and click-through rates.
- Demographic Data: Get to know your audience better through demographic insights.
Conclusion
Scheduling Facebook Reels is an invaluable strategy for small business owners looking to maximize their social media impact with minimal time investment.
Whether you choose Meta Business Suite or RecurPost, both tools offer the flexibility and efficiency needed to maintain a consistent and engaging online presence.
By understanding the unique features of each platform and tailoring your content accordingly, you can effectively expand your reach and connect with your target audience. Remember, in the fast-paced world of social media, staying ahead often means planning.
Frequently Asked Questions (FAQs)
You can schedule a wide variety of content as part of your Facebook Reels including short video clips, photos, graphics, text overlays, audio tracks, and more. Reels are very flexible in terms of multimedia integration.
Most Reels scheduling platforms allow you to plan and calendar content months in advance if needed. However, it’s recommended to schedule Reels no more than 1-3 months out for the best results.
If you are receiving publishing errors when attempting to schedule, ensure that you are following the cover photo and community standards requirements when it comes to imagery, music licensing, and length of clips. Restricted content can prevent a Reel from being scheduled.
While it varies by audience, research indicates that early to mid-morning tends to see high Reel engagement. Schedule some test Reels to determine when your followers are most active.
Properly scheduling high-quality, consistent Reels at optimal times for your audience should not hurt reach. On the contrary, intentional scheduling typically drives more engagement over random manual posting by maximizing visibility.
When editing your Reel within Facebook’s Meta Business Suite, use the slider tool below the composition workspace to lengthen or shorten the total duration of your Reel by adding or trimming clips and content blocks. You can set variable lengths up to 90 seconds maximum for an individual Reel.
While it is ideal to post 3 to 4 reels a day on Facebook, 25 reels a day is pretty much on the higher side that they allow without much negative repercussions. But the maximum limit to the number of reels in a day is around 35 on Facebook.
Saurabh Chaturvedi is a content writer at RecurPost. Specializing in social media management and marketing, Saurabh is dedicated to crafting engaging and informative articles. His passion for clear, exciting content keeps readers eager for more.