Going Live on Facebook to engage with your audience and promote your business can seem intimidating. That’s why learning how to schedule a Facebook Live properly is key to driving audience growth.
Facebook’s integrated scheduling feature is not only useful for planning live video events ahead of time but also effective in drawing viewers, especially when you have a limited number of followers. For instance, you can schedule Facebook posts related to your upcoming live video across different pages and groups.
Whether planning spontaneous live streams or more polished events, booking them ahead of time ensures higher visibility.
In this guide, I’ll show you, step-by-step, how to schedule and make the most of your live video events. Let’s get started!
Preparing for Your Facebook Live
Properly setting up both the technical and content aspects of your live stream ahead of time helps ensure a smooth broadcast. Consider this pre-planning checklist:
Technical Setup:
- Equipment- Ensure decent lighting, audio pickup, camera stability, and appealing backdrops using tripods, microphones, ring lights, etc. The quality doesn’t have to be perfect, but optimizing will build more trust with viewers.
- Internet Connection- A stable and fast internet connection is essential for smooth streaming. Aim for an upload speed of at least 5 Mbps. Recommended 4G network for Mobile users.
- Software – Facebook’s official tool, Meta Business Suite for managing your live streams. For more advanced features like overlays and graphics, consider using streaming software like OBS Studio or VMix.
Content Planning:
- Choosing a Topic- Select subjects that resonate with your audience’s interests and align with your brand. Also, consider preparing content that complements your live streams, like learning how to schedule reels on Facebook. These can act as teasers or follow-ups, keeping your audience engaged.
- Scripting- Outline talking points to sound polished and natural on camera without rambling. Time and practice run-throughs.
- Rehearsals- Practice to ensure a polished and professional presentation by creating a test broadcast before going live.
Facebook Live Stream Rules
When scheduling live streams, keep these Facebook rules in mind:
- Your stream will automatically go live at the set time. You must be connected within 10 minutes or the broadcast will automatically end.
- For a normal Facebook Go Live stream you can only schedule up to 24 hours in advance. But for an official Facebook Live Event, you can promote and schedule up to 1 year out.
- The minimum scheduling lead time is 10 minutes in advance. Anything less will be rejected.
- You cannot stream a single live broadcast across multiple destinations like Pages or Groups simultaneously anymore. This cross-posting is restricted now. However, you can crosspost to more than one page.
Facebook Live Content Policies
Additionally, Facebook enforces rules around deceptive and copyright-infringing live streams:
- Cannot broadcast pre-recorded videos deceptively implying they are live.
- Cannot falsely claim a location the stream isn’t coming from.
- Any pre-recorded portions must have clear labels indicating they are not live.
- Music usage faces restrictions – keep songs short and get rights-holders approvals.
Guide to Schedule a Facebook Live
Ready to schedule a Facebook Live and engage your audience? Follow these simple steps:
Go Live or Live Video Event?
First, decide between Go Live (schedule up to 24 hours in advance) and Live Video Event (schedule up to 1 year in advance).
How to Schedule a Facebook Live Video (Go Live):
1. Click on “Live Video” under the ”What’s on your mind” section.

2. Choose your posting destination.

3. Click “Select” on the Go Live card.

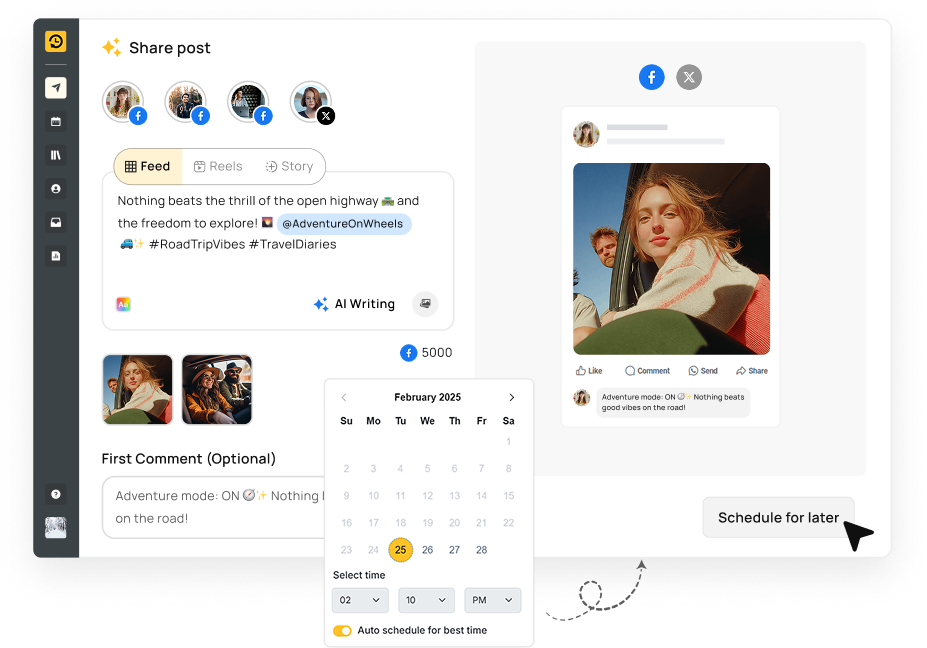
4. Click “Later” in the left menu and select the desired date and time.

5. Write the Title and Description to the post and save it.

6. Click “Schedule live video“.

How to Schedule a Facebook Live Video Event:
1. Head to Facebook Live Producer.
2. Choose the posting destination. (Steps 1 & 2 are the same as scheduling a Live Video)
3. Click “Select” on the “Create live video event” card.

4. Add event details: Name, Description, Date, and Time.

5. Create Facebook Live Link in Advance: Before scheduling, you can create a shareable link to your live event. This allows you to promote your live video in advance. To do this, look for the “Share” or “Copy Link” option within the event settings.
6. Click “Next” and “Create Event“.

How to Schedule a Facebook Live in a Group
Scheduling a Facebook Live in a group allows you to connect with your community at a time that works best for everyone. Here’s how you can do it on the desktop version:
1. Log in to Facebook: Open your web browser and go to Facebook. Log in to your account.
2. Navigate to Your Group: On the left sidebar, click on “Groups” and select the group where you want to schedule the live video.

3. Create a Post: Click on the “Create Post” option at the top of the group page. Choose the “Live Video” option from the available post types.

4. Set Up Your Live Video: A new window will appear where you can set up your live video. Fill in the details for your live video, such as the title and description. Click on the “Schedule Live Video” option.

5. Schedule the Live Video: Choose the date and time for your live session. Click “Schedule Live Video” to confirm.

6. Notify Group Members: Facebook will create a post in the group notifying members about the upcoming live session. This helps ensure that group members are aware and can join the live session at the scheduled time.
By following these steps, you can easily schedule a Facebook Live session in your group, ensuring maximum participation and engagement from your community. [Check Out: How to see scheduled post on Facebook app]
How to Test a Facebook Live Video
Before going live, you can create a test to rehearse your live video and adjust your settings. Testing helps ensure everything runs smoothly during your actual live event.
Note: This feature is only available to Pages and profiles in professional mode. Test broadcasts can’t be scheduled and are not available for live video events.
1. Go to Your Page: Click on “Live video“.
2. Create a Test Broadcast: At the bottom of the Go live card, toggle on “Create a test broadcast before going live” and click “Select“.

3. Set Up Your Live Video: Continue to set up your live video by adding a title, description, and adjusting other settings.
4. Start the Test: Click “Start test” to begin your test broadcast.
5. Review and End the Test: When you’ve finished testing, click “End test broadcast.”
How to Start a Scheduled Livestream:
For webcam:
1. Go to Live Producer.
2. Scroll down to “Scheduled Broadcasts“.

3. Find your video and click “Set up live video“.

4. Click “Go Live Now” when ready.

Note: The time limit for live streaming on Facebook is 24 hours. Make sure your scheduled live session fits within this time frame to avoid any interruptions.
For streaming software:
1. Go to Facebook Live Producer.
2. Select the Video Source as Streaming Software and copy the Stream Key.

3. Open any streaming software like OBS Studio. Paste the stream key in your software.

4. Add the Video source by choosing the Video capture device and make sure the correct Audio input is selected. When you have finished the setup, click Start Streaming.

Do you also want to schedule posts on your Facebook personal account? Check out our guide on how to do it.
How to Go Live on Facebook from a Mobile Device
Going live on Facebook from a mobile device is a convenient way to engage with your audience anytime, anywhere. Here’s a step-by-step guide to help you get started:
1. Open the Facebook App: Launch the Facebook app on your mobile device.
2. Create a Post: Locate the “Create Post” section at the top of your newsfeed.

3. Go Live: Tap the “Live Video” option.

4. Add Description: Tap the “Write something” field and add a description for your live stream. This will help viewers understand what your video is about.

5. Go Live (Optional): If you’re ready to begin broadcasting immediately, you can simply tap the “Go Live” button at this stage.

6. Schedule Live Video (Optional): Facebook doesn’t offer direct scheduling for live videos on mobile. However, you can create a Facebook Live Event (see previous section) and access it from your mobile app to start the live broadcast at the scheduled time.
Check out the best time to post on Facebook.
How to Schedule a Pre-Recorded Video on Facebook Live
While Facebook doesn’t have a direct built-in feature to schedule a pre-recorded video for a live stream, you can achieve this effect using the “Premiere” feature. Scheduling a pre-recorded video to broadcast as a Facebook Live session allows you to ensure quality content without the pressure of going live in real time.
Here are the steps to schedule a pre-recorded video on Facebook Live:
1. Upload Your Video: Go to your Facebook page and click on the “Create Post” button. Select the “Video” option and upload your pre-recorded video.
2. Add Details: Provide a title, description, and any relevant tags for your video.
3. Select Premiere: Instead of posting the video immediately, choose the “Premiere” option.
4. Set Premiere Time: Select the date and time you want your video to “go live.”
5. Confirm: Review the details and confirm your premiere settings.

Once you’ve scheduled the premiere, your video will appear to be a live stream at the specified time. Viewers can interact with the video as if it were live, leaving comments and reactions.
Note: You cannot stream to a scheduled Facebook Live from your phone. To go live at a scheduled time, you must use the Facebook desktop site or other compatible streaming software.
How to Make Changes to the Scheduled Livestream:
- You can edit your post, reschedule, or cancel your live video.
- Go to Live Producer > “Scheduled Broadcasts.”
- Click the three dots (…) for options.

Is your scheduled Facebook live stream not working properly? Check out all the detailed issues and their solutions here.
After the Live Stream
After your Facebook Live stream, it’s important to keep the momentum going.
1. Reposting Live Stream Content:
Reposting the content effectively extends its lifecycle. Consider creating highlight reels showcasing the best moments from your stream. These can be shared across social media platforms, reaching audiences who might have missed the live event.
Reposting the entire session as a video on your Facebook page offers a second chance for viewership. Remember to share this content in relevant Facebook groups to tap into new audiences.

2. Analyzing Performance:
Facebook offers robust analytics including
- Reach and Impressions – The total number of users who saw your live broadcast or any replay content, regardless of whether they clicked or interacted with it. This metric gives you insights into how often your content was shown.
- Interactions – Any likes, comments, shares, or other engagements with your live stream or related posts. This signifies how compelling your content is to viewers.
- Peak Live Viewers – The maximum number of simultaneous people watching during the broadcast. Indicates drawing power.
- Average Watch Time – The average duration viewed per person. Are people sticking around or dropping off quickly?
These metrics offer valuable information about your audience’s preferences and behaviors. Understanding the demographics of your viewers can help you tailor your content for future streams, ensuring it resonates more effectively with your target audience.

Best Practices for a Successful Livestream
To ensure a successful Facebook Live stream, consider these best practices:
- Technical Tips: Conduct a test broadcast. This helps iron out any technical issues and ensures a smooth live session.
- Audience Engagement: Interact with viewers by responding to comments and questions. This personal touch can significantly boost viewer engagement and loyalty.
- Promotion Strategies: Use multiple channels like Facebook Ads, social media posts, and emails to promote your live stream. Engage with relevant groups by scheduling Facebook group posts or consider running contests to drum up excitement.
- Monetization:
- Facebook Stars: Stars are a virtual currency that lets you earn money and interact with your followers. Meta pays for the stars that you receive.
To be eligible for Stars, creators must have 500 followers for at least 30 consecutive days and live in a country where Stars is available. - Subscriptions: Create a subscription for your Page and earn a monthly income. You can offer exclusive benefits and grow the community of people who subscribe to support you.
To be eligible for Subscriptions, creators must have 10,000 followers or 250+ return viewers. Pages also must meet one of the following criteria in the last 60 days: 50,000 engagements on posts. 180,000 minutes of video watched by followers. - In-Stream Ads: Include short ads in your Live and previously live videos to earn money.
To qualify for in-stream ads, you need: At least 10,000 followers. 600,000 total minutes viewed in the last 60 days.
- Facebook Stars: Stars are a virtual currency that lets you earn money and interact with your followers. Meta pays for the stars that you receive.
These strategies enhance the quality of your live stream and maximize your reach and potential revenue.
Don’t forget to check out our other blogs on how to schedule live streams on YouTube and TikTok.
How to Troubleshoot Facebook Live Videos
Even the most prepared livestream encounters hiccups sometimes. Here are some common issues you might face with Facebook Live, along with troubleshooting tips:
1. Connectivity Issues:
- Problem: Your video keeps buffering or dropping frames due to a weak internet connection.
- Solution: Make sure you have a strong and stable internet connection, preferably Wi-Fi. If using cellular data, check your data plan limits and consider using a location with better reception.
2. Audio or Video Problems:
- Problem: Your viewers can’t hear you properly or your video is blurry.
- Solution:
- Audio: Check if your microphone is muted on your device or Facebook settings. Test your microphone before going live.
- Video: Ensure your camera lens is clean and properly focused. Adjust lighting if necessary.
3. Can’t Go Live:
- Problem: You encounter an error message when trying to start your live stream.
- Solution:
- Restart the App: Close and relaunch the Facebook app on your device.
- Check App Updates: Ensure you’re using the latest version of the Facebook app. Updates often include bug fixes and performance improvements.
- Restart Device: Power off your device, wait a few seconds and then power it back on. This can sometimes resolve temporary glitches.
4. Limited Features:
- Problem: Certain features aren’t available, like scheduling live videos on mobile or adding guests for a live conversation.
- Solution:
- Review Platform Limitations: Some features may only be available on desktop or through third-party tools.
Additional Resources:
- Facebook Business Help Article: How to Troubleshoot Facebook Live Issues
- Facebook Help Center Article: Troubleshooting Facebook Live
Remember, by proactively testing your equipment and internet connection, you can avoid many potential issues. Additionally, familiarizing yourself with platform limitations helps you plan your live stream accordingly.
Conclusion
In conclusion, scheduling and conducting a successful Facebook Live stream is a straightforward process that can significantly enhance your digital presence.
By following the steps for preparation, scheduling, and post-event strategies, you can engage more effectively with your audience. Utilizing tools like Facebook Stars and in-stream ads also offers monetization opportunities.
I recommend you explore Facebook Live in your social media plan. It’s an excellent approach to building your brand by connecting with the audience and boosting engagement.
FAQs
How can I promote my scheduled Facebook Live effectively?
Yes, you can create Facebook ads and run promotions on other social media channels, through email marketing, and in group postings. Engaging content and timely reminders can also boost anticipation.
Is scheduling a Facebook Live better than going live spontaneously?
Scheduling a Facebook Live often leads to better engagement because it allows you to promote the event ahead of time, build anticipation, and prepare high-quality content. When you schedule Facebook Live, you give your audience a chance to plan to watch, which can significantly boost participation.
How far in advance should I schedule my Facebook Live?
You can schedule Facebook Live video up to one year in advance. However, the ideal window is a few days to a week before your broadcast. This timing gives you ample room for promotion and ensures your audience is aware and ready for the event.
What equipment do I need to schedule a high-quality Facebook Live?
To schedule a Facebook live stream with professional quality, you’ll need a reliable camera or smartphone, proper lighting, stable internet, and a clear audio setup. Using a tripod also helps keep your video steady and visually appealing.
What are some tips for engaging with viewers during my livestream?
To maximize engagement, interact actively with your viewers—respond to their comments, answer questions live, and keep your tone energetic and authentic. Also, aim for the best times to go live on Facebook, which are typically weekday afternoons or early evenings, to reach more viewers.
How to edit live video on Facebook?
You can’t make changes during a live stream, but once it ends, you can go to your video library, select the video, and choose “Edit Video.” From there, adjust the title, description, and thumbnail, and trim parts of the stream if needed. Just be mindful of the Facebook live stream time limit, which currently caps at 8 hours per session.
What if my Facebook Live isn’t working properly?
If your Facebook live stream is not working, double-check your internet connection, app permissions, and camera/microphone settings. Restarting the app or device often solves common streaming issues.
Can I choose a specific date and time to go live?
Yes! You can set a Facebook live date when scheduling your stream. This makes it easier to align your content with other campaigns or events.
How can I let people know about my upcoming live stream?
One great way is to schedule a Facebook event tied to your livestream. It creates a dedicated page where people can RSVP, get reminders, and interact with each other before you go live.
Is there a way to prepare pre-recorded videos for future posting?
Absolutely. You can schedule a video on Facebook by uploading it to your page and choosing a specific date and time for it to go live. This is perfect for planned content and ongoing video campaigns.
Any other tools I can use to stay consistent with Facebook content?
Yes! Consider using automated Facebook posting tools such as RecurPost. These allow you to plan and publish all types of content—including lives, photos, and updates—so your page stays active without constant manual work.
How to post live photos on Facebook iPhone?
It’s super easy! Just open the Facebook app, start a new post, and choose a Live Photo from your camera roll. Tap and hold the photo to make sure it’s animated, then post it—your friends can tap and hold to see it come to life!

Saurabh Chaturvedi is a content writer at RecurPost. Specializing in social media management and marketing, Saurabh is dedicated to crafting engaging and informative articles. His passion for clear, exciting content keeps readers eager for more.