Skip to content

How to Schedule a Live Stream on YouTube

How to Schedule a Live Stream on YouTube

Table of Contents

Live streaming has now become the current style for creators to communicate with their followers in real time. Whether you are a gamer, vlogger, comedian, or social media agency, live streaming on YouTube presents an amazing chance for you to bring your content to life and interact with your audience directly.

One of the key advantages of YouTube is the chance to set up a livestream on YouTube in advance. Scheduling live streams can help you create a sense of anticipation among your audience, provide more opportunities for the viewers to be present at the upcoming event, and give you enough time to promote your upcoming event. This will not only help you attract a wider audience but also provide a means for you to rehearse, resulting in a dynamic and entertaining viewing experience for your viewers.

This article aims to take you through the step-by-step procedure of scheduling a live broadcast on YouTube. Whether you are looking to stream live or present a pre-recorded video later on as a premiere, this guide will go through all the necessary steps, good practices, and tips to help you get the most out of your live-streaming experience.

What You Need Before Scheduling Your Live Stream

To move on to the process of live streaming on YouTube, let us look at the things you will have to fulfill first. Letโ€™s go through them one by one:

Verifying Your YouTube Account

The first thing you need to do to stream live is to verify your account on YouTube and prove that you are the owner of your account. Verified users have the privilege of accessing advanced features, for instance, live streaming, custom thumbnails, and long video posts of up to 15 minutes.

To verify your account, just go to youtube.com/verify and proceed according to the on-screen instructions. You will be required to provide a phone number as part of the verification process.

Verifying Your YouTube Account

Enabling Live Streaming in YouTube Settings

After verifying your account, you will need to enable live streaming for your channel. First, visit the YouTube Studio, enter the settings menu, and go to the “Live Stream” page. After that, you may turn on the live streaming for your channel as well.

Technical Requirements

Live streaming needs an internet connection that is constantly stable with an adequate upload speed. Although the exact requirements depend on the streaming resolution and quality settings you choose, it’s generally recommended to have an upload speed of at least 6 Mbps for 1080p streaming. Besides that, you will need a camera or a webcam, a microphone and either streaming software or hardware for live streaming.

Pre-Recorded Video (If Applicable)

If you are planning to schedule a pre-recorded video as a live stream in advance, you may want to prepare a video file of high-quality resolution that can be uploaded. Make sure that the video complies with YouTube’s recommended specifications such that it gets the best playback quality.

Once you’ve ticked off these requirements, you’re ready to move on to the next step: publishing your live stream or premiรจre on YouTube.

Step-by-Step Guide to Scheduling a Live Stream on YouTube

A. Scheduling a Live Stream On Desktop

Step 1: Accessing YouTube Studio

  • Start by signing into your YouTube account.
  • Click your profile pic in the top right corner and then select “YouTube Studio” from the dropdown menu.
Accessing YouTube Studio

Step 2: Creating a New Live Stream

  • Within YouTube Studio, locate the “Create” button (represented by a camera icon with a plus sign) at the top right corner, then click on “Go Live” to initiate the setup process.
Creating a New Live Stream

Step 3: Setting Up Your Live Stream Details

Here’s where you make your live stream stand out:

  • Title: Write a title that is clear and engaging, including specific keywords for better discoverability.
  • Description: Give a detailed description of what your stream will be about. Use this area to provide any necessary sources/hashtags.
  • Privacy Settings: Go for the Public, Unlisted, or Private categories considering your audience.
  • Thumbnail: Choose a vibrant and attention-grabbing thumbnail. This is your first impression, so take advantage immediately!
Setting Up Your Live Stream Details
Upload Thumbnail on video
Stream Visibility
Stream Visibility

Step 4: Scheduling Your Stream

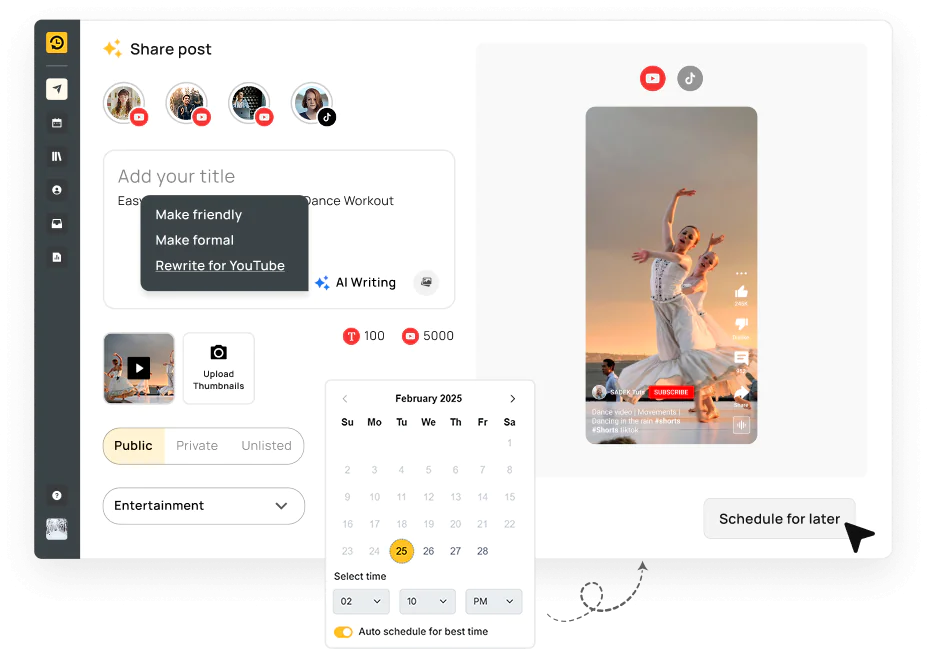
  • Set a livestream date and time. Consider when your audience is most active to increase live participation. Use your YouTube Analytics to find the best time to post on YouTube.
Scheduling Your Stream

Step 5: Advanced Settings

Dive into the Advanced Settings to tailor your live stream:

  • Live Chat: Enable live chat for real-time engagement with your viewers.
  • Monetization: If eligible, you can earn money from your live stream. Decide on Ads and Super Chat options here.
  • Age Restrictions: Set age restrictions if your content is not suitable for all audiences.
Advanced Settings
Advanced Settings

Step 6: Promoting Your Scheduled Live Stream

Get the word out:

  • Social Media: Share your scheduled live stream across your social media platforms. Use engaging posts and stories to spark interest.
Promoting on Social Media
  • Email Marketing: Send a newsletter to your subscribers with details about the live stream. Include a direct link.
Promoting by Email Marketing
  • YouTube Channel: Utilize your YouTube channel to promote the upcoming live stream. You can create community posts, schedule YouTube Shorts video teasers, or mention it in your existing videos.
Promoting on YouTube Channel

Following these steps will help you schedule your live stream smoothly and ensure it reaches and engages your intended audience effectively.

B. Scheduling a Pre-Recorded Video to Go Live

Step 1: Uploading Your Video

  • Navigate to YouTube Studio: Open YouTube Studio from your page. Click the “Create” button on the top right corner of the screen and choose “Upload videos” from the list.
  • Upload Process: Select the pre-recorded video file you want to upload from your device.
Uploading your pre-recorded video

Step 2: Entering Video Details

  • Title and Description: Make up a title that matches the subject of your video, and it must be catchy and interesting. Provide more context for your description and add any relevant links or calls to action.
  • Tags and Thumbnail: Select tags that improve discoverability. These should be relevant to your content and include potential search terms. Choose or upload a captivating thumbnail that stands out and attracts viewers.
Entering Pre-recorded Video Details

Step 3: Selecting the Premiere Feature

  • Understanding Premieres: YouTube Premiere allows you to schedule and launch a video as a live event, creating a shared viewing experience. It turns the video release into an event, complete with a live chat.
  • Setting Up a Premiere: While filling in your video details, you will find the option to set it as a Premiere under the Visibility option. Here, you can set the date and time when your video will be published.
  • Engaging With Your Audience: Take advantage of the waiting room function to engage with the audience before the video starts and thus ensure a more lively atmosphere during the livestream.
Selecting the Premiere Feature

Step 4: Advanced Settings for Pre-Recorded Videos

  • Customization Options: Dive into the advanced settings to fine-tune your video’s presentation and accessibility.
  • Comments: Decide whether to enable or disable comments. Engaging with comments can increase community interaction but may require moderation.
  • Playlists: Enhance your video discovery and spark your viewers to watch more of your video content by adding it to the playlists.
  • Age Restrictions: If your content is mature and not appropriate for all ages, then use age restrictions. This is essential to track YouTube metrics and ensure your content is viewed by the necessary audience.
Advanced Settings for Pre-Recorded Videos

These steps help you not only reach your audience efficiently but also boost engagement through the YouTube Premiere feature.

C. Through the YouTube mobile app (Android/iOS)

The YouTube mobile application makes it easy for content makers to schedule YouTube videos or events while they are on the move. Note that this method is only applicable to live content, and thus pre-recorded videos cannot be scheduled to go live.

Step 1: Open the “Create” Menu

Tap the camera icon, then select โ€œGo Liveโ€ from the options. This action initiates the live stream setup process directly from your mobile device.

Open the Create Menu on mobile
Open the Create Menu on the mobile

Step 2: Write Video Details

  • Here’s where you give your livestream its identity. Enter a catchy title to grab attention and a detailed description to inform viewers about what to expect. Remember, clarity and excitement are key!
  • Adding a thumbnail image is crucial. Select a picture that is both eye-catching and related to the live-streaming topic.
Write Video Details on mobile app
Write Video Details on the mobile app

Step 3: Click on the “Calendar” Icon

  • To schedule your live stream for a future date and time, tap the calendar icon. This step is essential for informing your audience when to tune in. Remember, timing is everything in maximizing viewer turnout, so consider your audience’s availability.
Click on the Calendar Icon
Set time of live stream

Step 4: Tap “Go Live” to Begin the Stream

  • Once you are all set and the scheduled time arrives, tap โ€œGo Liveโ€ to start streaming to your audience. Make sure you have a highly reliable network and that all your equipment (audio and video) is tuned as best as possible.

With YouTube mobile app the process of broadcasting live streams and scheduling them becomes easier and more convenient since creators can connect with the viewers on the go.

D. Third-Party Tools to Stream Live Video

You can amp up your YouTube live streams to a new level with Best YouTube scheduler that offer a variety of features that will increase the quality of both live and pre-recorded broadcasts.

To begin with, letโ€™s have a look into some of the widely used tools such as StreamYard and OBS Studio. While doing so, letโ€™s focus on some of the features the tools offer, especially in handling pre-recorded videos.

StreamYard

StreamYard
StreamYard
  • User-Friendly Interface: StreamYard stands out for being an easy-to-use software and suitable for both beginners and professionals. There is no need to install anything as it runs in your browser.
  • Pre-Recorded Video Streaming: One of the most advantageous options of StreamYard is the ability to stream live recordings.
  • Engagement Features: It has interactive features like on-screen annotation, live polls, and discussion forms, making it simple to keep the audience engaged in real time.
  • Multi-Streaming: StreamYard offers you the possibility to stream simultaneously on multiple platforms including YouTube, Facebook, and Twitch, multiplying your audience.

OBS Studio

OBS Studio
OBS Studio
  • Advanced Customization: OBS Studio is a popular choice with content creators who like its powerful customization capabilities. Itโ€™s an open-sourced software where you get the best features for free.
  • Pre-Recorded Video as Live: OBS has a functionality that lets you stream pre-recorded videos live on YouTube, enabling a desirable stream of high-quality content for your live show.
  • Scene Transitions: OBS includes various scene transitions and professional audio/video mixing resources that can be used to give live streams an attractive and more professional outlook.
  • Plugin Ecosystem: A large number of plugins allow users to introduce new capabilities and features that improve OBS, and let users get a unique experience.

When you are selecting a third-party streaming tool for YouTube, think about your technical competence, the particular functionality you need, and your desired interaction with your viewers. Both StreamYard and OBS Studio come with distinct sets of options that target broadcasting from different angles and that make your streams and pre-recorded movies unique.

Best Practices for a Successful Stream

A successful stream not only engages your fans but also builds your community on YouTube. Given below are some strategies to make sure your premiere is creating crowd buzz so the audience enjoys it:

1. Share Behind-The-Scenes Content and Teasers

  • Build Anticipation: Catch some attention from fans by publishing behind-the-scenes bloopers and promo videos on your Facebook, Instagram, and YouTube accounts. It generates the viewer’s curiosity and their feeling of anticipation towards the event.
  • Create a Story: Post stories to Instagram, Facebook, or short YouTube videos to reveal the creative process, the most exciting moments, or the challenges you faced. It personalizes the experience and makes viewers feel part of the journey.
Share Behind-The-Scenes Content and Teasers

2. Engage With Your Audience in the Chat During Live Stream

  • Be Present: Being involved in the chat makes your viewers feel important and listened to. Reply to comments, answer questions, and provide input to keep the discussion going.
  • Create a Community: During the introduction, viewer interaction builds a community of audiences which is most valuable.
Engage With Your Audience in the Chat During Live Stream

3. Promote Your Scheduled Stream in Advance

  • Use All Your Platforms: Promote your premiere across the board in your various platforms – your social media, emails, and YouTube. The objective is to reach out to your audience regardless of the medium they are in.
  • Consistent Messaging: Ensure your promotional content is consistent in messaging, creating a cohesive and recognizable campaign for your premiere.
Promote Your Scheduled Stream in Advance

4. Utilize Third-Party Tools for Enhancements

  • Elevate Your Content: Take advantage of third-party tools and add overlay, animation, or any other form of visual editing. This does not only enhance the visual appeal but it also keeps your audience interested from start to the end.
  • Accessibility Features: Include subtitles or closed captions to the content so your audience can be all-inclusive even for people who are deaf or have hearing disabilities too.
Utilize Third-Party Tools for Enhancements

By incorporating these practices, you will be able to transform your premiere into a much more effective initiative. They not only create interest and engagement but also allow you to establish a stronger relationship with your audience, building a loyal fan base for future content pieces. For further insights on how live streaming can be leveraged to grow your business and build a dedicated audience, check out our blog on Live Streaming for Business.

Common Mistakes to Avoid with Pre-Recorded Videos

When it comes to scheduling pre-recorded videos on YouTube, ensuring a smooth and successful streaming involves not just preparation but also anticipation of potential pitfalls. Here are some common mistakes to avoid:

1. Not Double-Checking Video and Audio Quality

  • Quality Check: Before scheduling your video, review it thoroughly for any video or audio issues. Poor quality can significantly affect viewer retention and overall impression.
  • Test on Different Devices: Watch your video on different devices (phone, tablet, computer) and with different headphones or speakers to make sure the audio and video quality works well even in various playback scenarios.
Not Double-Checking Video and Audio Quality

2. Scheduling Conflicts with Other Events

  • Research Your Niche: Be aware of other significant events happening in your niche that could detract from your audience’s attention. This includes other live streams, premieres, or major events (e.g., award shows, sports events).
  • Pick an Optimal Time: Schedule your premiere when your audience is most attentive (this is the data you get in your YouTube Analytics) and there is less competition for attention.
Scheduling Conflicts with Other Events

3. Lacking a Backup Plan for Technical Difficulties

  • Prepare for Issues: Even with pre-recorded videos, technical issues can arise. Have a backup plan, such as a secondary video file or a ready-to-go live stream setup to engage with your audience while you resolve the issue.
  • Communication is Key: If any issues occur, communicate promptly with your audience through the chat feature, social media, or a follow-up video to explain the situation and provide updates.

Additional Tips:

  • Engagement Over Promotion: While promoting your video is crucial, avoid over-promoting without providing value or engaging content in the meantime.
  • Ignoring YouTube SEO: Donโ€™t forget to optimize your video title, description, and tags for search. Neglecting YouTube SEO can lead to your video being harder to discover, even with a successful premiere.

Avoiding these common errors would make sure your pre-recorded video streams will not be as difficult as you could imagine. Hence, the secret to a successful launch consists in planning, controlling for quality, and making sure the schedule is precisely set.

Conclusion

Hosting live-streaming sessions and sharing pre-recorded clips on YouTube is a very effective approach to driving viewers to your channel and promoting your content. You can make your content stand out from the crowd only if you thoughtfully lay out the plan for it, do an effective promotion, and involve the unique features of YouTube and third-party tools.

Remember to avoid video quality, scheduling conflicts, technical problems common misconceptions. If you adopt the right strategy each premiere and livestream game can add to your channel success enabling you to create consistent content to draw the community towards you and make your goals easier. Take whatever works for you, listen to your audience, and keep on improving your strategy for the best results.

Frequently Asked Questions

1. How do I verify my YouTube account to schedule a live stream?

To verify your YouTube account, go to youtube.com/verify, follow the on-screen instructions, and provide a phone number. Verification allows you to upload videos longer than 15 minutes and schedule live streams.

2. Why can’t I find the option to schedule a live stream?

Ensure that your YouTube account is verified and there are no restrictions on live streaming within the last 90 days. Also, use YouTube Studio to access the live streaming options.

3. Can I schedule a live stream directly from my phone?

Yes, you can schedule a live stream on the YouTube app directly from your phone. However, check that your account is verified and you followed all the YouTube live-streaming guidelines.

4. Whatโ€™s the best time to schedule a livestream or video premiere?

The best time depends on your audience’s location and online habits. Consider using YouTube Analytics to see when your viewers are most active. A general tip is to aim for evenings and weekends when people are more likely to be free.

5. Why isn’t my scheduled livestream attracting viewers?

Try to promote your upcoming posts by either sharing the link on social media, your website or through email newsletters. Engage your viewers with creative teasers or snippets. YouTubeโ€™s Community tab is also a great tool for reminders and countdown posts.

6. What should I do if I encounter technical issues during a live stream?

Have a backup plan, like a second streaming device or software. If issues arise, communicate with your audience through the chat or on social media to keep them informed, and try restarting the stream if necessary.

7. How do I engage with viewers during a livestream?

Use live chat to engage your audience. Ask for their thoughts, answer questions, and acknowledge their comments. This interaction makes viewers feel valued and enhances their viewing experience.

8. Can I schedule a pre-recorded video to premiere as a live stream?

Yes, YouTube’s Premiere feature allows you to schedule pre-recorded videos to be watched live with your audience, complete with live chat.

9. Can I change the scheduled time of my livestream or premiere after announcing it?

Yes, you can change the scheduled time. Go to your YouTube Studio, find the video or stream, and edit the details. Just be sure to update your audience to avoid confusion.

10. How do I make sure my livestream looks and sounds good?

Conduct a test stream using YouTube Studio’s “Stream” option to check your video and audio quality. Adjust your equipment and settings as necessary before going live.

Try
RecurPost

Schedule and Publish your posts on multiple social accounts, read and reply to incoming messages with social inbox, and collaborate with your team and clients with ease.

We use cookies to enhance your browsing experience, analyze site traffic, personalize content, and serve targeted advertisements. By clicking "Accept All Cookies," you consent to our use of cookies. You can manage your preferences through "Cookie Settings." For more information, please refer to our Cookie Policy.