Instagram Influencer Marketing: Proven Strategies for 2025
Influencer marketing on Instagram works for brands of all sizes. Find the right influencers for
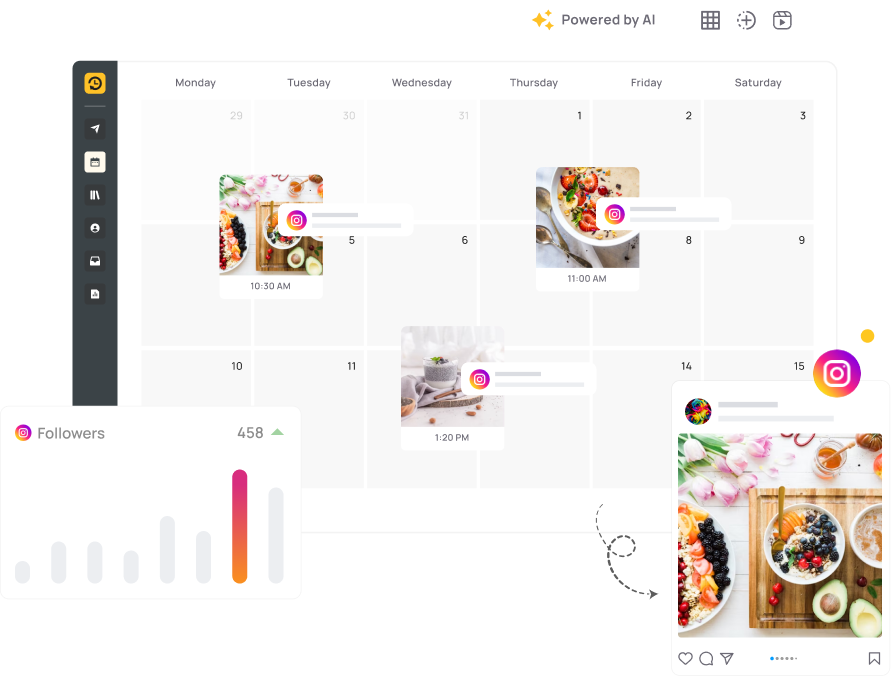
Instagram scheduler to schedule posts, stories and reels automatically. Plan your content calendar and manage social media posting with ease.
Price: 9
Price Currency: USD
Operating System: web
Application Category: SocialNetworkingApplication
Schedule Instagram posts, stories and reels automatically. Plan your content and grow your audience with consistent social media posting.

Schedule and automate your Instagram feed, Stories, Reels, and Carousels to reach your audience at the right time.
Use AI to craft captions, pick hashtags, and create timely posts for events and holidays.
Access Instagram analytics to find your top-performing content and best posting times.
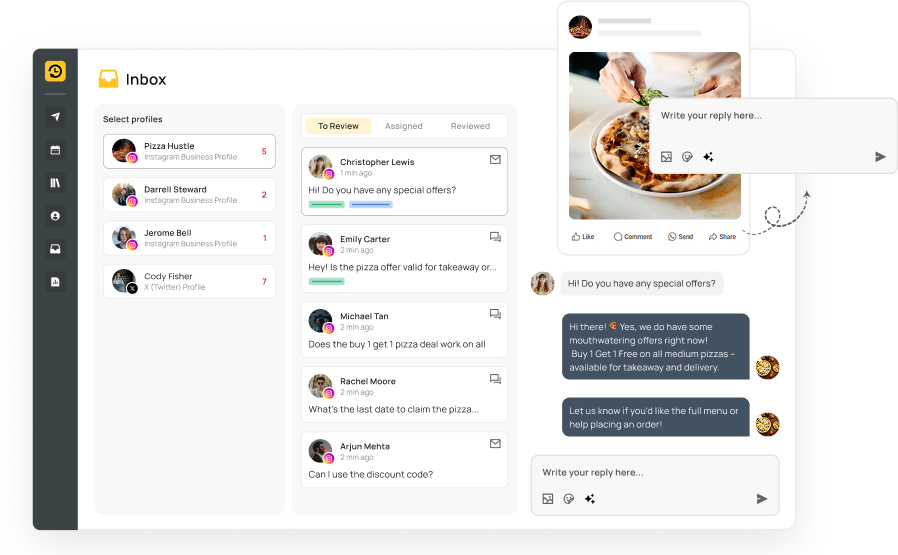
Handle Instagram comments, direct messages, mentions, and collaborations from one dashboard.
Share your posts across all your Instagram Business, Personal profiles — and let the
smart scheduler handle the hard work!
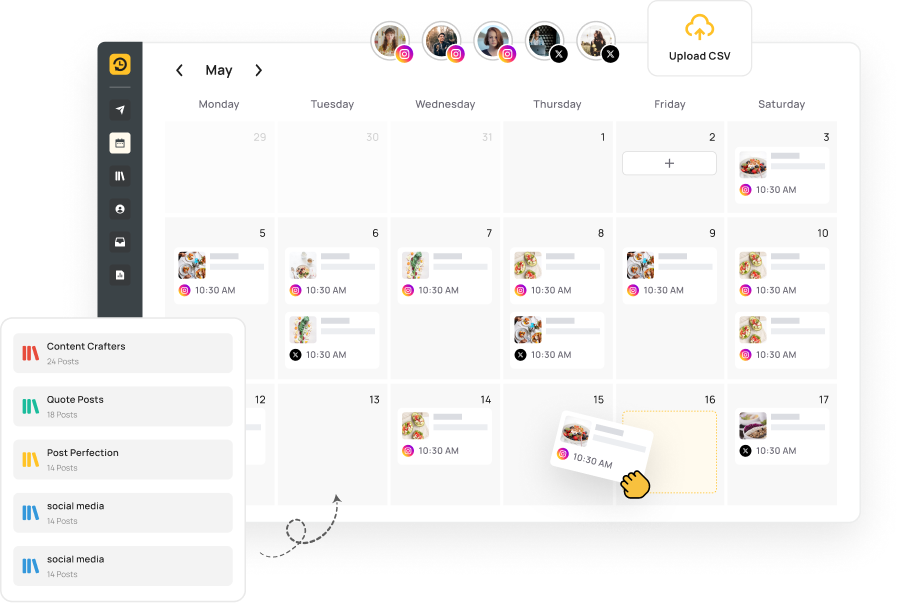
RecurPost's visual calendar helps you plan your Instagram content:
Need help with captions or posting schedules?
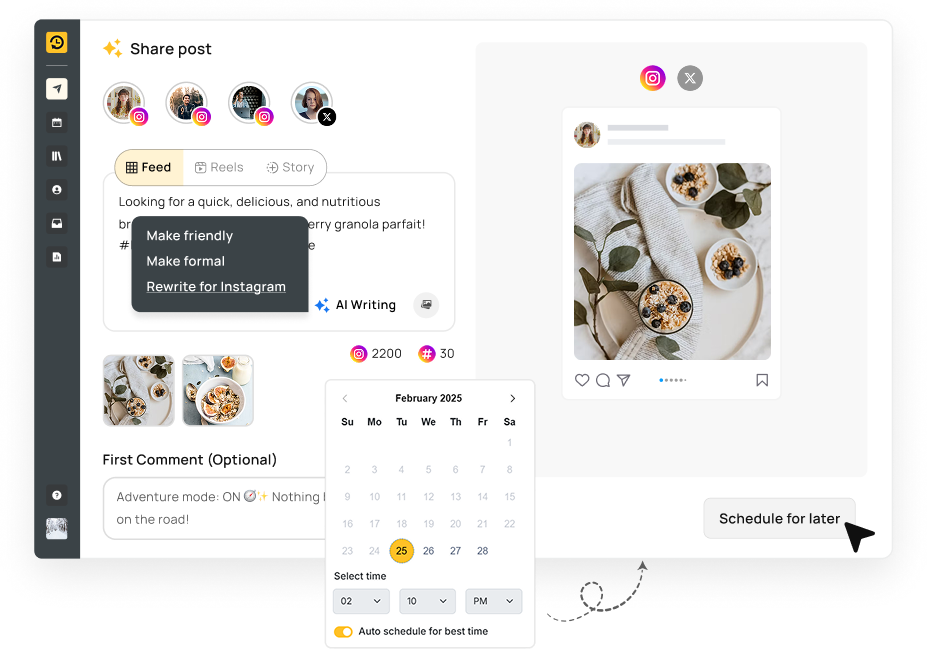
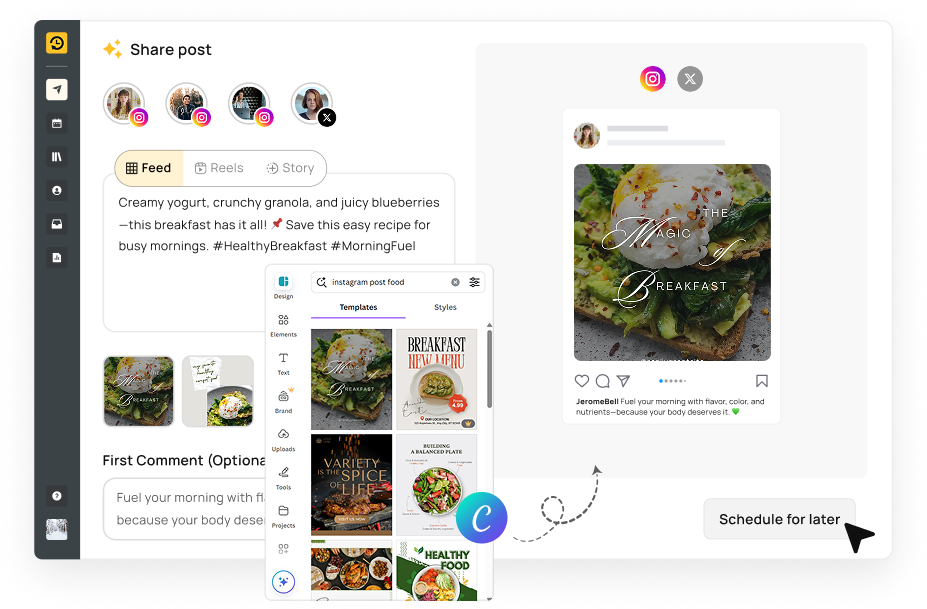
Present a polished Instagram presence:
Streamline your Instagram interactions:
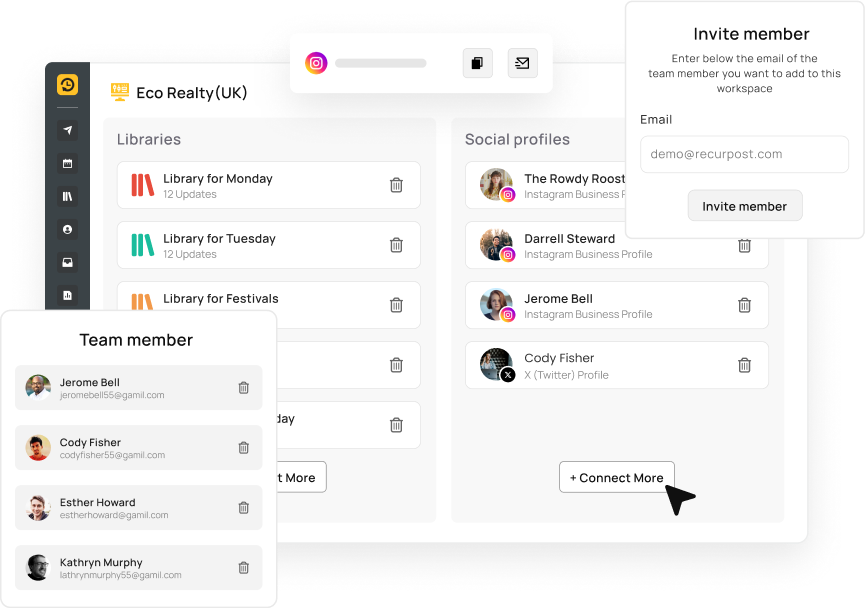
For individuals and businesses managing multiple Instagram profiles:

Influencer marketing on Instagram works for brands of all sizes. Find the right influencers for
Instagram metrics guide for 2025. Track reach, engagement rate and follower growth with analytics insights.
The best Instagram apps for planning your feed and scheduling posts. See how these tools
RecurPost simplifies Instagram scheduling, saves you time, and boosts your impact. It takes just minutes to begin.
Scheduling Instagram posts with tools like RecurPost, Hootsuite, or Later saves time by letting you batch-create content in one session instead of posting daily. It keeps your feed consistent even on busy days so followers know when to expect new content. You can plan campaigns and special events weeks in advance, ensuring themes flow smoothly and deadlines are met. By picking times when your audience is most active, you boost reach and engagement without having to be online at odd hours. Plus, team collaboration features let you assign drafts, review captions, and approve posts before they go live.
Yes, you can schedule Instagram Stories and Reels using third-party platform like RecurPost. This tool let you upload Story frames or Reel clips, add captions and choose a publish date and time. For example, in RecurPost you simply:
Your Stories and Reels will then post automatically, so you can focus on creating rather than remembering to hit “Share”.
Instagram’s native app only allows live posting, so it doesn’t include a built-in scheduler. To plan content ahead, you need a Business or Creator account linked to Meta Creator Studio or a third-party tool. These services use Instagram’s Graph API to give you calendar views, media libraries, and caption fields that the app itself lacks. Without switching to a Business/Creator profile and connecting to an external scheduler, you can’t set future publish times or batch posts.
You can schedule Instagram posts without extra software by using Meta’s Creator Studio on desktop. After converting to a Business or Creator account and linking Instagram in Creator Studio:
Creator Studio then publishes automatically, with no other app required.
Scheduling from Facebook happens in Meta Business Suite, which unites Facebook and Instagram in one dashboard. To schedule:
This workflow keeps cross-platform branding consistent and saves you from switching between apps.
Yes, tools like Meta Business Suite, RecurPost, and Buffer let you schedule content simultaneously on Facebook and Instagram. Here’s a typical Meta Business Suite process:
Your post goes live on both platforms at once, saving time and ensuring message consistency.
Posts may fail because your Instagram access token has expired or account permissions changed, cutting off the scheduler’s API access. To fix this in RecurPost or Creator Studio:
Once tokens are valid and permissions are intact, scheduled posts should publish as expected.
No, scheduling doesn’t harm engagement. In fact, it can improve it by posting when followers are most active. Algorithms prioritize relevance and timing over manual versus scheduled posting. By analyzing past performance (likes, comments, saves) and choosing peak hours, scheduled content often reaches more people and drives higher interaction. Consistency also builds audience trust, as followers learn when to expect fresh posts.
Yes, you can design in Canva and import directly into schedulers like RecurPost or Buffer. After creating your graphic in Canva:
This lets you maintain brand templates and high-quality visuals without manual file handling.
Meta Business Suite supports Reel scheduling on desktop and mobile. To schedule a Reel:
Business Suite then automatically posts your Reel at the chosen time.
From desktop, you can schedule via RecurPost’s web app or Meta Creator Studio. For RecurPost:
For Creator Studio, follow the steps in Q4. Both offer drag-and-drop media, hashtag suggestions, and preview features for a full desktop workflow.
No, personal accounts can’t connect to scheduling APIs. You must convert to a Business or Creator profile in Instagram settings to unlock scheduling features in RecurPost, Meta Creator Studio, or other tools. Once converted, link the account in your scheduler, and you’ll gain access to future-date posting.
RecurPost provides analytics for LinkedIn posts that include impressions, engagement metrics, audience growth, and click-through rates.
Users can track which posts perform best and identify high-performing time slots. These insights help refine content strategy and maximize ROI. Reports can be white-labeled and exported, making them especially useful for agencies managing multiple clients.
Please note: These analytics are available only for LinkedIn Pages and are not supported for personal LinkedIn Profiles.
Yes. In RecurPost:
Your evergreen content then reposts automatically according to your defined pattern, ideal for reminders, promotions, or regular updates.
Yes, both RecurPost and Creator Studio offer preview modes. In RecurPost:
This ensures your post looks perfect before the scheduler sends it live.
Yes. In RecurPost’s advanced editor:
At publish time, tags embed automatically, making your posts shoppable and highlighting co-creators without extra live editing.
Missing push alerts doesn’t stop scheduled content. RecurPost’s server-side scheduler publishes Stories and manual posts at the set time, regardless of mobile notifications. You can monitor the Activity Log in your dashboard to confirm successful publishing or restart any failed items.
Yes. To schedule a carousel in RecurPost:
RecurPost preserves slide order and metadata, then posts the full carousel automatically.
Instagram automation uses tools like RecurPost, OnlySocial, and Jarvee to handle tasks—scheduling posts, auto-replying to comments, and sending welcome DMs—on your behalf. This continuous engagement builds follower relationships without manual effort. Automation workflows can trigger actions based on specific events, such as sending a thank-you message when someone comments or follows.
Auto-scheduling involves selecting your media, composing a caption, and setting a date/time in tools like RecurPost or Buffer. For example, in RecurPost:
RecurPost then queues your post and publishes it automatically, with email or in-app alerts if any errors occur.
Posts may not publish because your Instagram account’s API credentials have expired or permissions were revoked. To resolve:
After refreshing your connection and confirming permissions, scheduled posts should resume publishing without issues.
4.8 Star Rating
4.6 Star Rating
2023, 2024 Winners
4.7 Star Rating
4.6 Star Rating