Why Teams Choose RecurPost
One Instagram scheduler. One clean workflow.
Plan, create, approve, publish, and track without jumping between tools.
Plan, create, approve, publish, and track without jumping between tools.
Plan content in advance, publish on time, and keep performance in view. RecurPost is a professional Instagram scheduling app built for social media managers, agencies, and busy teams.


An Instagram scheduling tool is an app that lets users set a date and time for publishing Instagram content, like posts, Reels, and Stories. Instead of posting manually every day, create content in batches, schedule it once, and stay consistent.
A strong Instagram planner also goes beyond scheduling. It keeps content organized, tracks post performance, and makes it easy to reuse what already works.
A scheduling app connects to an Instagram Business (or Creator) profile through Meta permissions. Content is stored in the scheduler, then published at the scheduled time when auto-publish is available. After publishing, performance data (reach, saves, comments, clicks) can be pulled into the tool so results are easy to review.
Quick version: Connect Instagram → Create content → Preview the post → Schedule post → Publish automatically → Track results
Manual posting works for real-time moments like trends, last-minute updates, or fast news. But relying on it every day often creates gaps, rushed content, and missed posting windows.
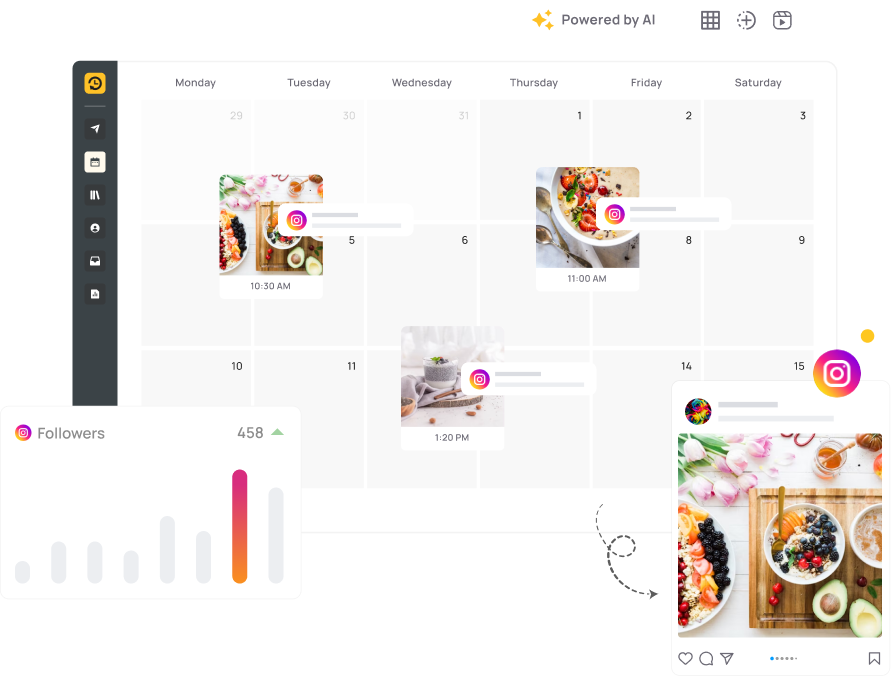
An Instagram scheduler keeps publishing steadily, shows what’s coming next in a calendar and grid view, keeps reviews tidy, and brings performance tracking into one place.
Manual posting breaks the workday into small interruptions. Scheduling solves that by letting teams batch-create content in focused sessions, then set dates and times once. Bulk scheduling keeps weeks of content ready, so growth doesn’t depend on being online at the exact posting time.
Consistency keeps a brand visible. Scheduling keeps the calendar filled during travel, busy weeks, or last-minute delays. A visual calendar makes gaps obvious, balances posts/Reels/Stories, and keeps the pace steady so patterns become easier to spot.
As content grows, mess grows too, unless everything stays organized. A central content library keeps assets easy to find and reuse. Saved caption templates and hashtag groups speed up drafting. Feed previews reduce “we posted the wrong thing” moments. Workspaces keep teams and clients aligned.
Scheduling is more than convenience; it supports planning. Map launches, promos, seasonal content, and recurring series weeks ahead, then adjust without panic. Use performance insights (top posts, best days, best time slots) to decide what to schedule next, and keep evergreen content ready so trend posts don’t break the week.
Manage Instagram, Facebook, Google Business Profile, LinkedIn, TikTok, and more from one dashboard. Plan once, keep messaging consistent, and stop jumping between apps.
Schedule once and publish to Instagram and Facebook together, or adjust copy per platform. Campaigns stay aligned, and missed posts drop.
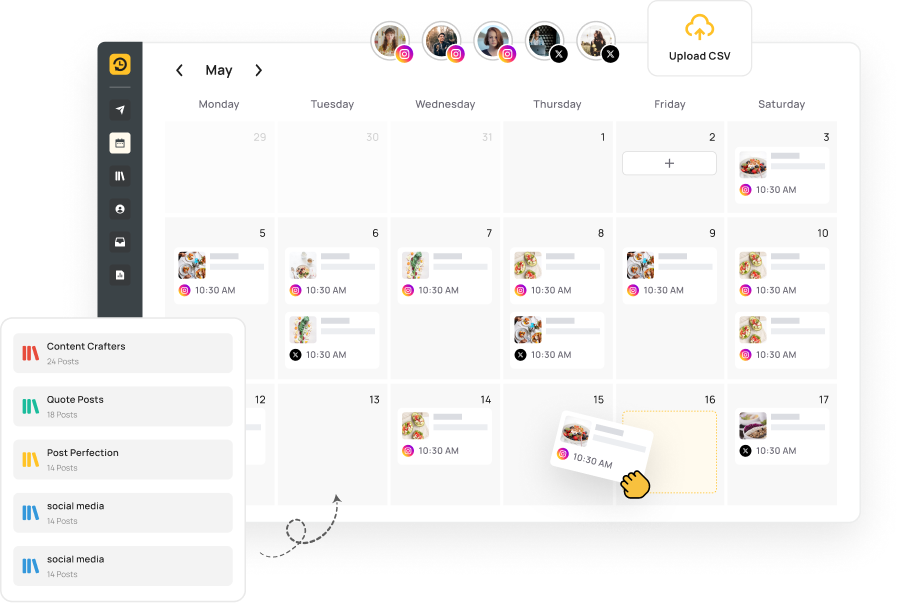
See every scheduled post in one calendar view. Spot gaps, avoid posting piles on the same day, and filter by platform when needed.
Schedule across networks in one flow and adjust content to each platform’s format. Import, reuse, and schedule faster, especially when managing many accounts.
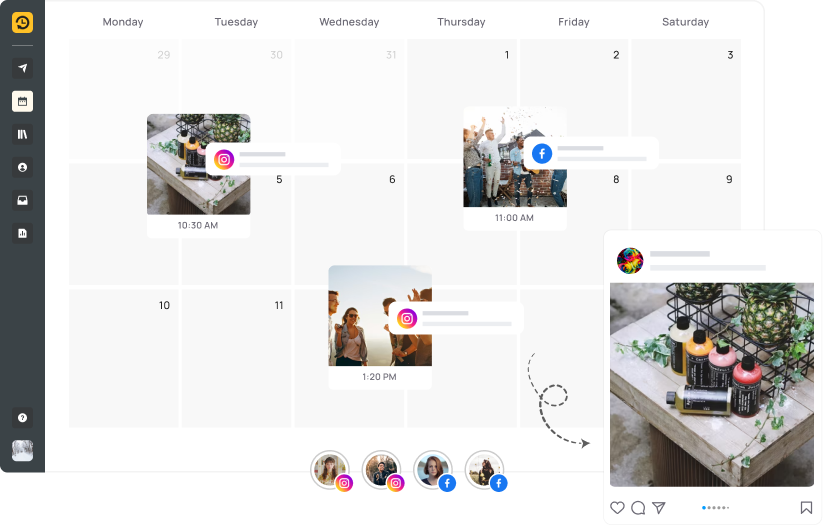
Create your post, choose a time, and publish automatically when auto-publish is available. Plan weeks ahead, keep posting steadily, and use performance data to guide the next batch.
Step 1: Connect Instagram in RecurPost (add the account and approve access).
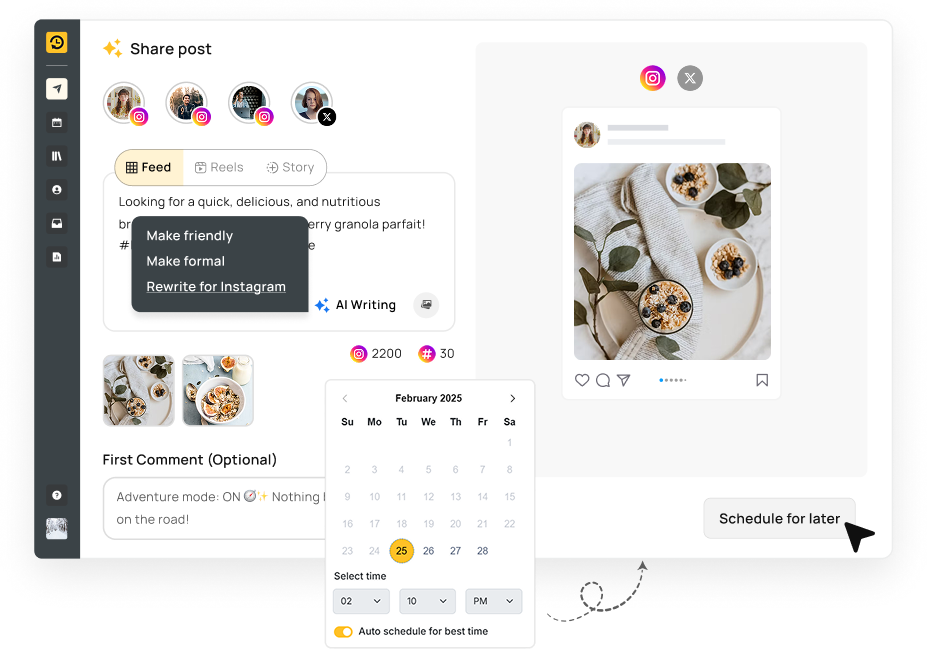
Step 2: Create a post and choose Feed.
Step 3: Add media, caption, and hashtags.
Step 4: Pick a date/time or turn on Auto schedule for the best time, then schedule.
Turn on Auto schedule for the best time, and RecurPost assigns a publish time based on your past activity patterns. Posting when followers are active can lift early reactions like likes and comments.
Bulk scheduling is built for high-volume posting (20+ posts a week). Upload a CSV file with one post per row (caption, media URL, post type, publish time, and more), then schedule many posts in one go, ideal for agencies and social media managers.
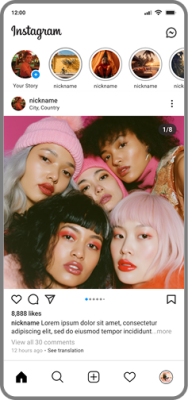
Reels show up in places like the Reels feed and Explore, which can bring new reach. Scheduling keeps that reach steady by keeping Reels going out at a reliable pace.
Step 1: Connect Instagram in RecurPost (add the account and approve access).
Step 2: Create a post and choose Reels.
Step 3: Add media, caption, and hashtags.
Step 4: Pick a date/time or turn on Auto schedule for the best time, then schedule.
Create Trial Reels from the RecurPost web composer to test early performance before sharing a Reel with all followers.
Two trial modes are available. Manual lets the final decision happen inside Instagram. Auto lets Instagram expand reach only when the trial performs well.
Trial Reels require an Instagram profile with at least 1,000 followers.
Track Reel performance in one place: reach, engagement rate, and other results, so it’s clear what connects best. Use those insights to plan future Reels that drive stronger outcomes.

Stories keep a business visible at the top of the app and drive actions like replies, DMs, and link clicks. Scheduling Stories keeps daily visibility steady without daily posting.
Step 1: Connect Instagram in RecurPost (add the account and approve access).
Step 2: Create a post and choose Story.
Step 3: Add media and text.
Step 4: Pick a date/time or turn on Auto schedule for the best time, then schedule.
When auto-publish is available, Stories go live at the time you choose. No reminders and no manual posting inside the Instagram mobile app. That means fewer missed Story slots and more dependable daily activity.

Schedule posts, reels, and stories at the best times and keep your content running even when
you're offline.
See Posts, Reels, and Stories in one place, so weekly planning takes minutes, not hours. Built for planning, pacing, and clean execution.
Choose a day and time, pick the Instagram profile, add media and captions, then schedule. Create one-off posts or recurring content without rebuilding the plan every week.
Move posts by dragging and dropping to reschedule fast. Switch between monthly, weekly, list, and grid views to match the job planning, editing, or feed preview.
Schedule more in less time with bulk upload.
Upload multiple feed posts, Stories, and Reels together, add captions, and publish now or schedule for later. Great for batching a full week (or month) in one sitting.
Upload a CSV file (up to 250 posts per file), map each column to the right field, preview everything, then schedule all posts. Edit any post before publishing if needed.
There’s no single “best time” that works for every account. Posting times change based on audience, region, content type, and season.
Use your own Instagram analytics to spot when followers react fastest. Look for patterns by day and hour, then schedule more posts inside those windows.
Test a few time slots, compare results, and keep the times that bring better reach and engagement for your audience. RecurPost can also auto-schedule posts into strong time windows based on past patterns.
Schedule Instagram Carousel Posts with drag-and-drop ordering, bulk uploads, and auto-publish for consistent, on-brand storytelling.
Create carousel posts by selecting multiple media files. Use carousels to show product steps, tips, before/after, or a multi-part story.
Order matters. Drag media to rearrange the carousel so the story flows the right way before publishing.
Auto-publish works for eligible Instagram Business (and some Creator) accounts. Personal accounts often use push notifications instead. When a reminder comes in, copy the caption and post in Instagram-fast, simple, and reliable.
Preview posts before they go live so captions, hashtags, spacing, and visuals look right. Make edits before publishing, no last-minute surprises.
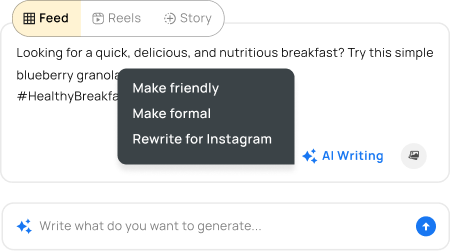
Turn a simple idea into caption options in seconds. Pick a tone, generate a few variations, then edit and schedule.
Start with a short prompt like “new menu launch” or “behind-the-scenes shoot,” choose a tone, and get caption options that match your brand voice.
Generate captions that fit Instagram limits, then save favorites as templates for faster posting later.
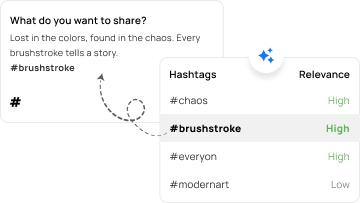
Get hashtag ideas based on your topic and audience. Mix broad and niche tags, then save sets for reuse.
Enter keywords like “Black Friday Sale” or “Real Estate Tips” and get a ready set of tag ideas in seconds.
Use a mix of tags per post, rotate sets over time, and track which hashtag groups drive reach, especially for Reels and carousels.
Turn text prompts into image options you can use for posts and Stories. Generate a few variations, pick the best, then schedule.
Create post ideas for the week, series themes, or campaign angles based on audience and tone, then turn those ideas into scheduled content faster.

Use a template-style calendar view to map dates and times, spot gaps early, and avoid repeating the same content back-to-back.
Plan all formats together so nothing gets ignored. Feed posts carry the core message, Reels drive reach, and Stories keep daily touchpoints active.
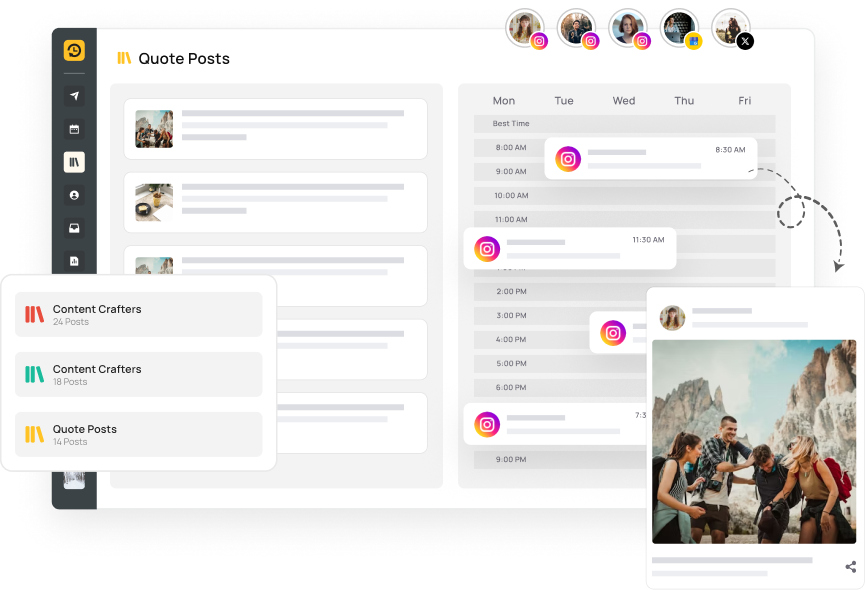
Store assets with previews so content is easy to scan and reuse. No digging through drives, chats, or email threads.
Tag by theme, product, campaign, or client. Filter in seconds when planning a calendar or rebuilding a seasonal campaign.
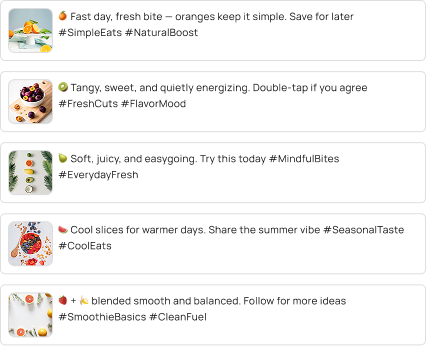
Schedule two versions at different times, compare results, then repeat what performs better.
Clone a post and adjust captions, hashtags, and tone for different regions, languages, or account audiences fast and consistently.
Trial Reels support faster Reel testing when content variations are part of the weekly plan. Create the Reel from the web composer, run it as a trial, then decide what goes wider.
Use Manual mode when approval or timing needs control inside Instagram. Use Auto mode when reach should expand only after strong trial signals. This requires 1,000+ followers on the connected Instagram profile.
If you want, a shorter “micro version” (2–3 lines each) can be provided to match tighter feature blocks on the page.
Use bulk scheduling, team workflows, and white-label reports to run every client’s content flawlessly.
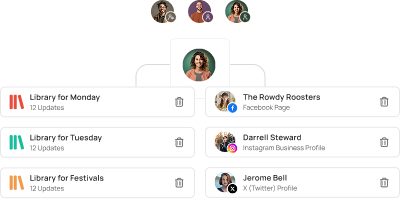
Keep work moving with shared calendars, shared drafts, and clear handoffs. Everyone sees what’s planned, what’s in review, and what’s ready.
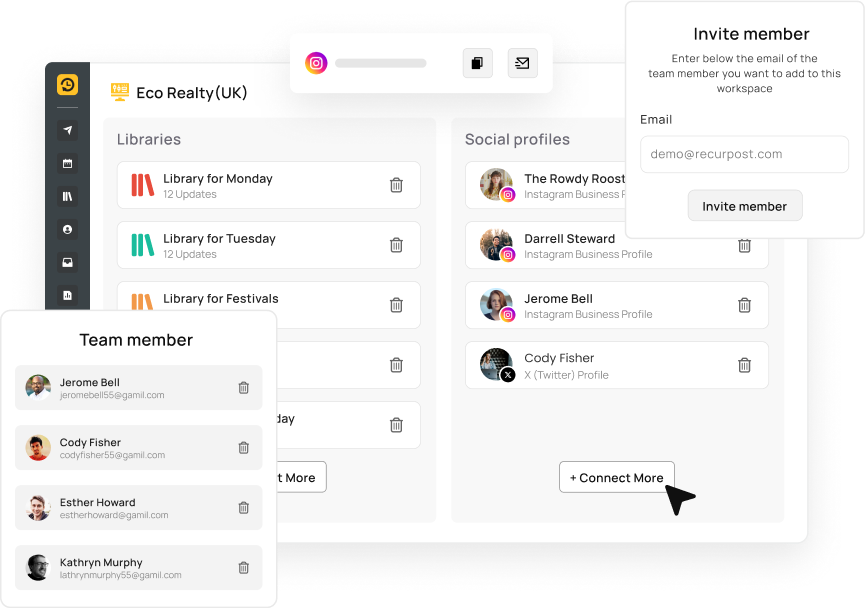
Switch between accounts fast while keeping drafts, captions, and creatives tied to the right brand so teams can run parallel campaigns without mix-ups.
Use workspaces to separate brands and clients. Track status (draft, in review, approved, scheduled) so handoffs stay clean.
Control who can draft, edit, approve, publish, and view analytics. Give clients view/comment access without giving publishing access.
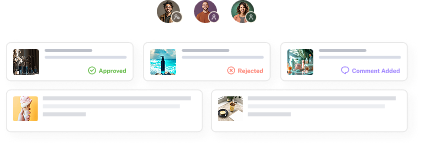
Stop posting without review. Keep approvals clear, reduce last-minute edits, and track what’s pending vs ready.
Review captions, visuals, hashtags, mentions, and timing in one place. Approvers can approve or send back for edits, with notifications to prevent delays.
See pending, approved, and scheduled posts in one shared calendar. Spot gaps and clashes early so deadlines feel easier.
Send client-ready reports with your branding without extra formatting work.
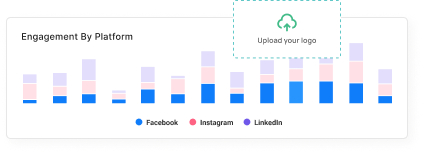
Add logo, brand colors, and agency name. Share follower growth, engagement rate, reach, impressions, and top content in a clean layout.
Manage client calendars, approvals, and reports from one dashboard. Clients can view calendars and results in read-only mode.
Bring DMs, comments, and mentions into one place so nothing gets missed and replies stay consistent across the team.
Filter, assign, label, bookmark, and manage comments in one view. Move threads from “To Review” to “Reviewed”, and draft replies faster with AI.
Reply to DMs inside the inbox instead of bouncing back to the Instagram mobile app. That means faster replies and fewer missed leads.
Spot tagged posts and brand shoutouts quickly, reply on time, and keep community conversations moving.
Send fast, consistent replies even after hours, so conversations
don’t go cold.
Send instant responses based on keywords or triggers. Share links, FAQs, pricing, or next steps in seconds and reduce manual reply load.
Send a friendly message when someone follows. Share a link, freebie, menu, or booking page while interest is high.
Compare engagement across formats and time periods. Spot patterns by day, time, campaign, and content type.
See what spreads beyond followers vs what stays limited. Use results to adjust visuals, hooks, and formats.


See top content at a glance: plays, watch time, saves, shares, and comments. Then reuse what worked by creating new versions.
Compare hashtag sets, remove tags that don’t perform, and refresh lists based on results, so discovery improves without guessing.
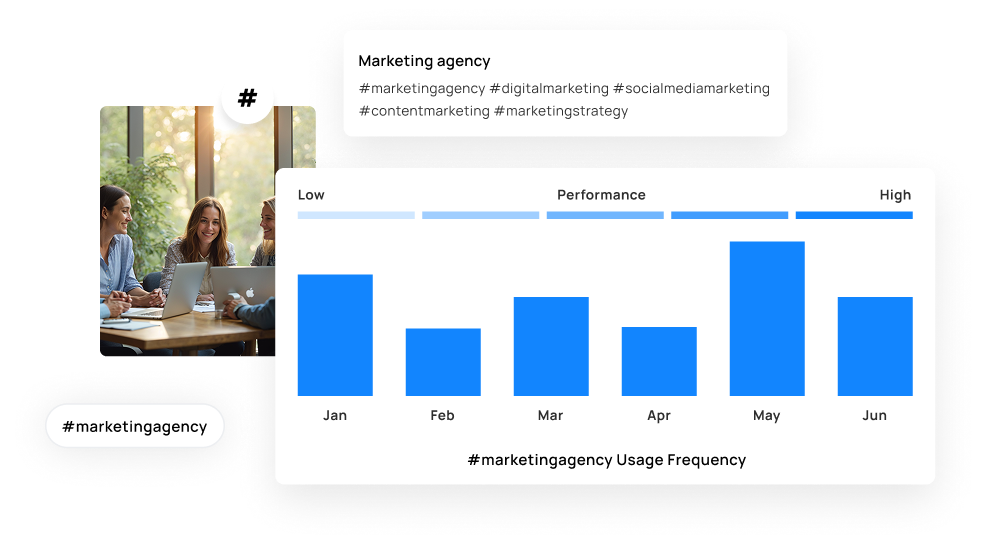
Use real insights to post at peak times, track performance, and grow faster with proven strategies.
Save evergreen posts so they can be reused later. New followers still get to see the content that already proven it can perform.
Choose top posts based on engagement and reach, set spacing between repeats, and let RecurPost re-queue them on the schedule you set. Pause or restart anytime.
Turn a post into recurring content with a repeat pattern you choose. That keeps weekly reminders, promos, and series running without redoing scheduling every time.
Keep Instagram consistent without assigning a fresh date and time to every post.
Queue content into your saved time slots. Posts can be paused, edited, or reordered without breaking the schedule. Great for campaign changes.
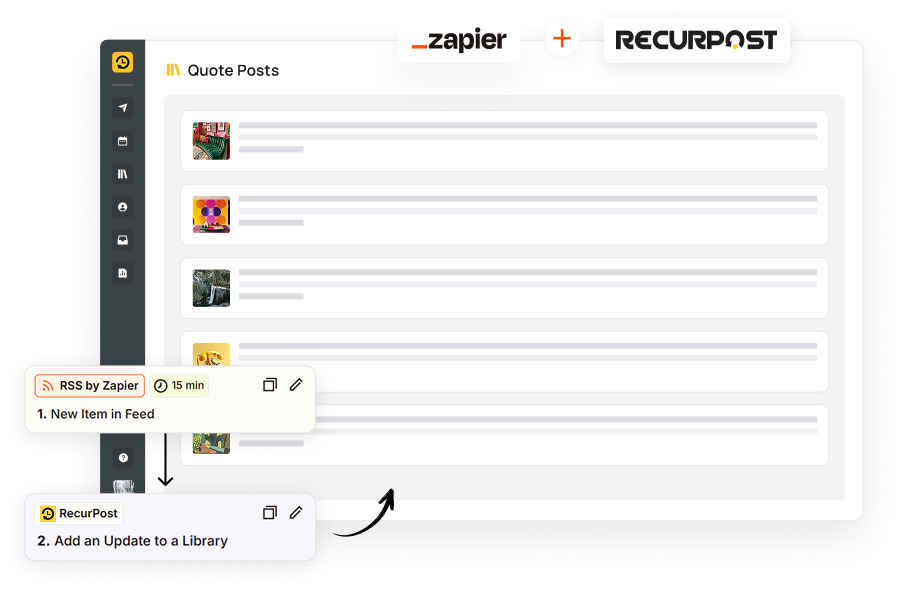
When fresh content runs low, approved evergreen posts can keep the schedule active. RSS feeds can also bring in new content to reduce posting gaps during busy periods.
Connect to Instagram, create content, pick a time, and schedule. Publishing becomes steady, and performance stays easy to track.
Go to Social Profiles, choose Instagram, and connect through Meta login so RecurPost can publish and pull reporting data.
Upload your image/video, add a caption, hashtags, mentions, and first comment text if needed.
Pick the content type, choose date/time (or Auto schedule for best time), preview, then schedule.
Content goes live at publish time. Review results and use them to plan the next batch.
Step 1: Connect Instagram in RecurPost.
Step 2: Click Share a post.
Step 3: Choose Feed, Reel, or Story.
Step 4: Add media, caption, hashtags, and mentions.
Step 5: Choose date/time or Auto schedule for best time, then schedule.
Step 1: Connect Instagram.
Step 2: Schedule a post so it appears on the calendar.
Step 3: Choose a view: Weekly, Monthly, List, or Grid.
Step 4: Drag and drop to rearrange, filter, or pause the queue when plans change.
Step 1: Connect the Instagram profile.
Step 2: Create a library and import posts in bulk.
Step 3: Review and edit before confirming.
Step 4: Set time slots or use best-time scheduling.
Step 5: Confirm, then check Calendar/Queue to see everything lined up.
Bonus: Plan a full week of on-brand posts in minutes using the “Plan weekly post with AI” feature, then schedule right away.
Real Stories, Real Growth
The best time is when followers are online and ready to react. Test a few time slots, then stick with the windows that bring faster likes, comments, saves, shares, and visits.
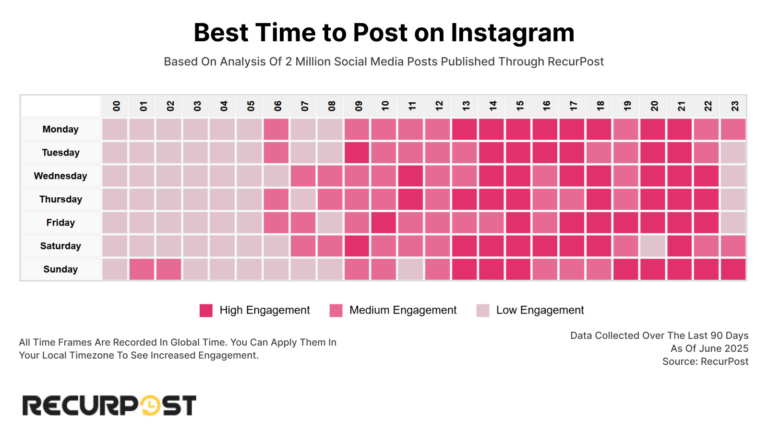
Timing changes by niche. B2B often performs on weekdays during work hours. Food, fitness, travel, and entertainment often peak in evenings and weekends. Test 2–3 windows weekly and compare results.
Skip generic charts. Post similar content at different times, track early engagement, and watch patterns by day and hour.
Pick a pace that can be kept. Many brands do well with 3–5 feed posts per week, regular Stories, and steady Reels. Consistency beats short bursts followed by silence.
Mix promos with tips, behind-the-scenes, community posts, and quick updates so the feed stays balanced and campaigns don’t crowd out everything else.
Feed posts build long-term value, Reels drive reach, and Stories keep daily touchpoints. Planning all three together prevents format overload.
Each post should give something: a tip, a checklist, a quick win, or a clear takeaway. Useful content earns saves and shares, which can lift reach over time.
Hashtags work best when they match the content and audience. Build theme-based sets, rotate them, and avoid stuffing tags just to hit a number.
Instagram allows up to 30 hashtags, but more isn’t always better. Start with 8–15 relevant tags, test, and keep the range that performs best for your account.
Broad tags bring volume. Niche tags bring stronger intent. Mix both so discovery stays targeted.
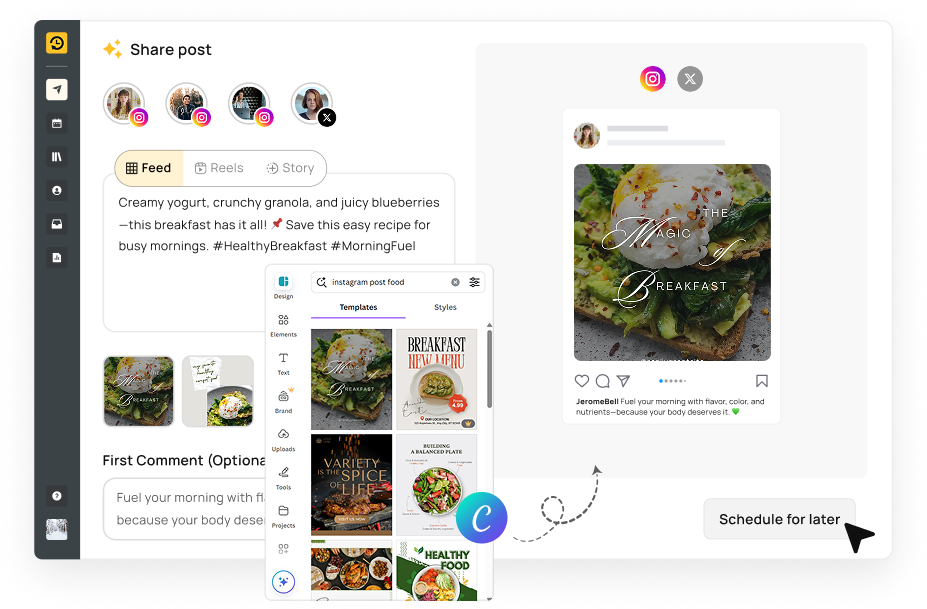
Create the post, open Canva from inside the scheduler, choose the finished design, attach it, and schedule. No downloading and re-uploading.
Use templates, keep brand colors consistent, and build designs for posts and Stories while staying inside the same planning workflow.
Schedule posts, reels, and stories at the best times and keep your content running even when you're offline.
An Instagram scheduling tool should cover Posts, Reels, and Stories from one calendar. Auto-publish matters for Business and some Creator accounts. A reminder flow matters for accounts that need manual posting.
Teams need approvals, roles, and a shared calendar that shows what’s pending and what’s ready. Reporting should track performance across formats, not just feed posts. Pricing should stay reasonable as more accounts and team members get added.

Buffer stays clean and quick for basic scheduling. It works well for solo creators who want a simple queue and a steady posting rhythm. RecurPost fits teams that post at a higher volume. It adds bulk scheduling, content recycling for evergreen posts, and longer-view reporting that makes Instagram results easier to review.

Later shines for visual planning and feed previews. It suits creators who care most about what the grid looks like before anything goes live. RecurPost goes further once planning is not the only task. It adds queues, recycling, bulk uploads, approvals, and team-ready calendars that suit busy weekly schedules.

Hootsuite covers many platforms and works for large org setups. It can feel heavy if Instagram is the main channel and the team wants a lighter day-to-day flow. RecurPost stays lean for Instagram-first work. It still covers auto-publish (where supported), calendar views, bulk scheduling, and reporting without making the workflow feel crowded.

Planoly is popular for grid planning and visual layout. It’s a solid pick for creators who plan the feed like a portfolio. RecurPost fits ongoing content operations. It adds recycling, queue scheduling, approvals, roles, and reporting that agencies and growing teams rely on across multiple accounts.
RecurPost puts planning and publishing in one place, then adds the systems that keep posting steady. Bulk scheduling speeds up batching. Auto-publish keeps campaigns on time for supported accounts.
RecurPost also supports approvals, evergreen recycling, AI content creation, and white-label reporting. That mix works well for social media managers, agencies, and businesses that post daily and report results on a schedule.
Try all features with our free Instagram
scheduler trial
/ 14 days
Affordable Instagram scheduling plans for
growing businesses
/ per month
Agency pricing for Instagram management
at scale
/ per month
Scheduling Instagram posts with tools like RecurPost, Hootsuite, or Later saves time by letting you batch-create content in one session instead of posting daily. It keeps your feed consistent even on busy days, so followers know when to expect new content. You can plan campaigns and special events weeks in advance, ensuring themes flow smoothly and deadlines are met. By picking times when your audience is most active, you boost reach and engagement without having to be online at odd hours. Plus, team collaboration features let you assign drafts, review captions, and approve posts before they go live.
A strong Instagram scheduler matches real work. It should publish on time, show a clear calendar, and track results. It should also keep Posts, Reels, and Stories in one place.
For teams, look for approvals, roles, and shared calendars. For agencies, look for workspaces per client and white-label reports. RecurPost covers these needs in one workflow.
Yes. Meta Business Suite can schedule Posts and Reels for eligible Business or Creator setups. Instagram must be connected to a Facebook Page for this route.
Free tools can feel tight once you need a calendar view, approvals, or cross-platform planning. RecurPost runs a 14-day free trial, so full scheduling can be tested before paying.
Scheduling alone does not cut engagement. Results come from the post itself, timing, and steady posting. Scheduling just keeps timing steady, even on busy days.
It also makes testing easier. Try the same content style at two time slots, then compare likes, saves, comments, and shares. Keep the time slots that bring faster reactions.
Start by connecting an Instagram Business or Creator account through Meta permissions. Then create your content inside the scheduler. Add media, caption, hashtags, and mentions.
Pick the content type: Post, Reel, or Story. Choose a date and time, or use auto-schedule if available. Check the calendar to see the full week before anything goes live.
You can schedule Instagram posts without extra software by using Meta’s Creator Studio on desktop. After converting to a Business or Creator account and linking Instagram in Creator Studio:
Creator Studio then publishes automatically, with no other app required.
Yes, tools like Meta Business Suite, RecurPost, and Buffer let you schedule content simultaneously on Facebook and Instagram. Here’s a typical Meta Business Suite process:
Your post goes live on both platforms at once, saving time and ensuring message consistency.
Yes. Stories can be scheduled through Meta tools for some account setups. Third-party tools can also schedule Stories in the same calendar as Posts and Reels.
Auto-publish depends on the account type and Meta access. If auto-publish is not supported, a reminder is sent at publish time. The Story is then posted from the Instagram app.
For example, in RecurPost, you simply:
Yes. To schedule a carousel in RecurPost:
RecurPost preserves slide order and metadata, then posts the full carousel automatically.
Yes. In RecurPost:
Your evergreen content then reposts automatically according to your defined pattern, ideal for reminders, promotions, or regular updates.
Connect to Instagram, then set up your workspace. Add brand assets, saved captions, and hashtag groups if the tool supports it. This keeps drafting fast later.
Create a post, preview it, then schedule it. Use the calendar to spot gaps and crowding. Use reports to guide what gets posted next week.
Auto-publish is a big one when Meta supports it for the account. A visual calendar matters too, since it shows the feed plan at a glance. Drag-and-drop rescheduling saves time during last-minute changes.
Bulk scheduling is also valuable for high-volume work. Add reporting, saved hashtag sets, post previews, and team approvals. For agencies, add roles, workspaces, and white-label reports.
From a desktop, you can schedule via RecurPost’s web app or Meta Creator Studio.
For RecurPost:
1. Log in at recurpost.com and click “New Post“.
2. Upload your photo/video and draft your caption.
3. Use the calendar picker to select a publish date and time.
4. Click “Schedule”.
For Meta Creator Studio:
1. Log in to Meta Creator Studio at business.facebook.com/creatorstudio.
2. Click on the “Create Post” button.
3. Select Instagram and choose whether you’re posting to your feed or Reels.
4. Upload your photo or video and write your caption.
5. Select the publish date and time using the scheduling option.
6. Click “Schedule” to confirm your post.
Both platforms offer drag-and-drop media, hashtag suggestions, and preview features, providing a seamless desktop workflow experience.
Yes. If Instagram is linked to a Facebook Page, Meta Business Suite can schedule Instagram Posts and Reels. This works well for basic publishing.
To schedule:
For multi-platform planning, a scheduler keeps Instagram and other channels in one calendar. That is useful when campaigns run across Instagram and Facebook together.
Auto-publish works through Meta permissions for eligible accounts. Connect the Instagram account, then schedule the post inside the tool. At publish time, it goes live without manual steps.
Some setups still use reminders instead of auto-publish. In that case, the reminder arrives, and the post is finished in the Instagram app.
Running many accounts needs separation and clear ownership. Workspaces keep each brand or client away from the others. Roles keep drafting, reviewing, and publishing controlled.
A shared calendar keeps timing visible across all accounts. It also reduces mix-ups, like posting the wrong creative on the wrong profile. RecurPost supports this type of setup for client-heavy work.
There is no universal time that works for every account. Timing depends on audience habits, region, and the content format.
Use Instagram Insights or scheduler reports to find patterns. Track day and hour trends, then schedule more posts inside the time windows that bring faster reactions.
Start with what is coming up: launches, promos, weekly series, and seasonal moments. Then map Posts, Reels, and Stories across the week so the mix feels balanced.
Batch-create content, then schedule it in one sitting. Use calendar previews to catch gaps early. Keep a few open slots for real-time posts and trends.
Yes. Instagram Business accounts can connect to Meta tools and third-party schedulers. Business accounts also get stronger reporting access through Meta permissions.
That makes auto-publish more likely, based on Meta rules. It also keeps analytics and publishing in one place, which is useful for teams.
Yes. In RecurPost’s advanced editor:
At publish time, tags embed automatically, making your posts shoppable and highlighting co-creators without extra live editing.
Batch work wins here. Create visuals, then write captions in a single session. Save hashtag sets and caption templates for faster reuse next time.
Store drafts in a content library so nothing gets lost. Then schedule the full week and review it in calendar and grid views. AI tools can speed up captions, hashtags, and visuals when content needs to move fast.
The best Instagram post scheduling apps in 2026 include RecurPost, Hootsuite, Sprout Social, Later, Buffer, Social Pilot, Sendible, and Sked Social. These tools help creators, businesses, and agencies publish content consistently, improve engagement, and manage multiple accounts efficiently.
Instagram’s native app only allows live posting, so it doesn’t include a built-in scheduler. To plan content ahead, you need a Business or Creator account linked to Meta Business Suite or a third-party tool. These services use Instagram’s Graph API to give you calendar views, media libraries, and caption fields that the app itself lacks. Without switching to a Business/Creator profile and connecting to an external scheduler, you can’t set future publish times or batch posts.
There are several reasons why you might be unable to schedule posts on Instagram. Here are some common issues and solutions:
Posts may fail because your Instagram access token has expired or account permissions changed, cutting off the scheduler’s API access. To fix this in RecurPost or Creator Studio:
Once tokens are valid and permissions are intact, scheduled posts should publish as expected.
Missing push alerts don’t stop scheduled content. RecurPost’s server-side scheduler publishes Stories and manual posts at the set time, regardless of mobile notifications. You can monitor the Activity Log in your dashboard to confirm successful publishing or restart any failed items.
If your scheduled Instagram post is not showing up, this could be due to:
If the issue persists, feel free to contact RecurPost’s support for further assistance.
Start your free trial today and schedule Instagram posts, reels, and stories effortlessly. No credit card required.
Join thousands of businesses managing their Instagram content strategy with RecurPost.

Join our webinar to learn how to use AI to create Viral posts.

