
“How do I delete/leave this age-old Facebook group ya?!”
This question might subconsciously pop up every now and then in your mind when you receive random notifications on Facebook about group messages.
Facebook has been around for a long time in our lives. The craze of making an account and connecting with most people was real back then with how to schedule Facebook posts with using social media scheduler. As soon as accounts were created and people got the notification indicating “Your Friend is now on Facebook,” we were added to truckloads of Facebook groups almost no matter the time!
There were groups for school friends and family members and so many random groups for sharing jokes and even game requests! Sounds weird now, doesn’t it? We have had Facebook through high school and college, and still receive notifications from the Tennis group made in 10th class.
With the growth of other social media sites like Instagram and Snapchat and the introduction of Whatsapp, Facebook has lost the importance that was given to informal groups. We have mostly moved to formal groups and the ones belonging to a particular community.
You can clean up your FB account for many reasons. Maybe that Tennis club group no longer meets, or the Business startup ideas page does not provide any kind of value now. Doesn’t matter what the reason for you is; the process remains the same.
We have compiled all the steps below for deleting a Facebook group from your phone and desktop.

How to delete a Facebook group?
Pages and Groups on Facebook
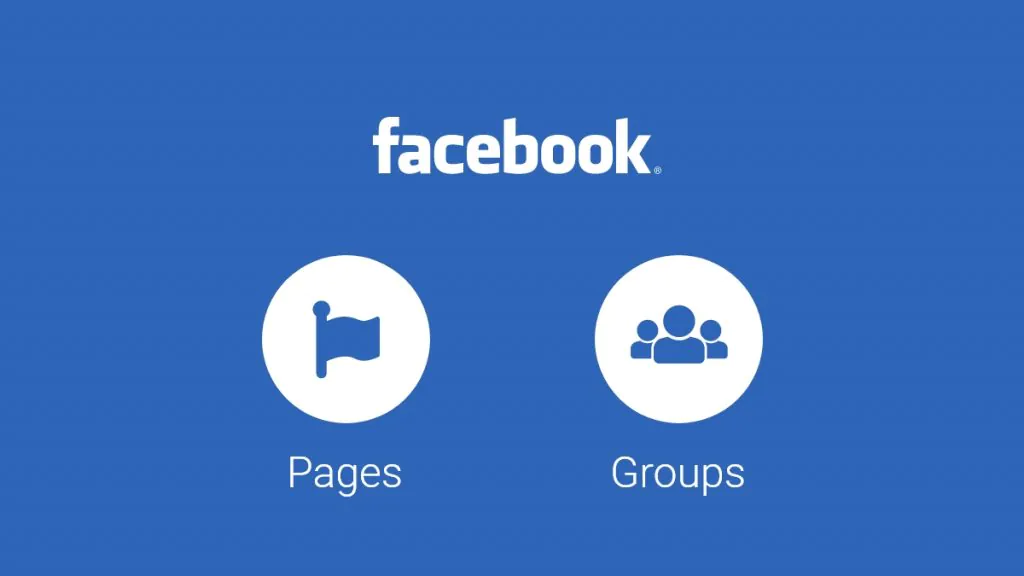
First and foremost, let’s have a look at the difference between Facebook pages and groups.
Facebook pages are generally made for businesses, product brands, celebrities, politicians, NGOs, etc. They are created to provide information about a business’s products and services. It is similar to a basic profile in the structure; just the intent is for the brand to become the entity instead of the person behind the profile.
A Facebook group is a space where like-minded people interact. The people who are in a group have the same interests and want to share their opinions in a single place. The person who created the group can keep it private or public. Groups can basically exist for any reason. They can be made for colleagues to connect, raise funds for a cause, talk about an event, or simply share cat videos.
Now, when you are the group’s admin, it is possible to completely delete it by removing all the members in the group. You will have first to remove all the group members and then remove yourself.
Delete a Facebook group from your phone when you are the admin
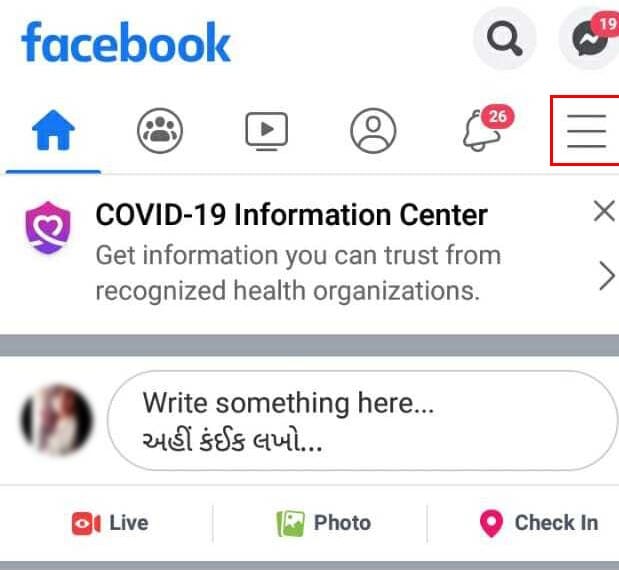
- Open the “Facebook” application. It has a dark blue icon with a white-colored “f”. This will open your News Feed only when you log into your Facebook account.
(If you are not logged in, the login page will appear. Enter your email or phone number and password to continue.)
- While on the home screen, tap on the last button on the top right corner that indicates three parallel lines. If you are using an iPhone, it will be in the bottom right corner of the screen.
- A complete menu will appear having a lot of options to access from a single place. Your profile icon and name will be on the top. Below it, after 3-4 options, the ‘Groups’ section will be there.
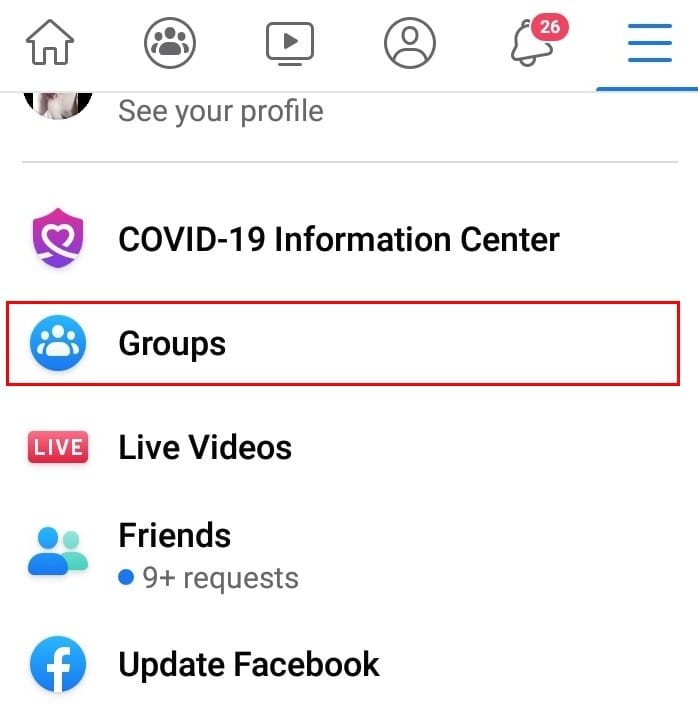
- By clicking on it, you will be taken to your customized group feed. In the beginning, you will see a carousel of all the groups that you have made or are a part of.
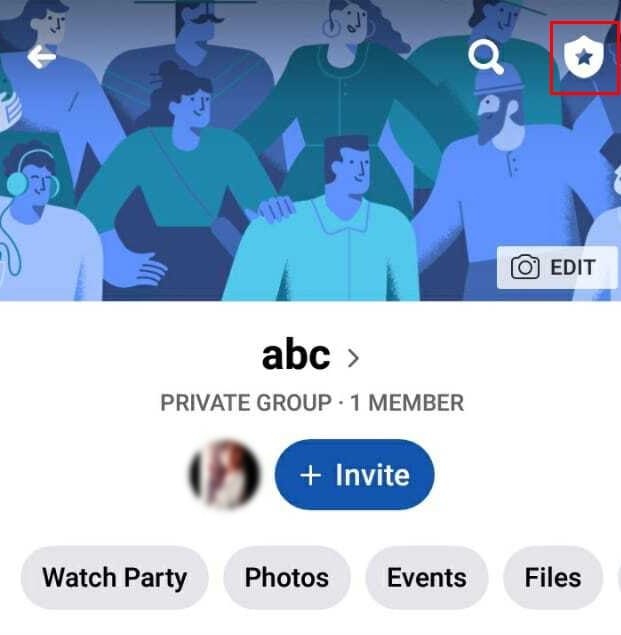
- Select the group that you want to delete.
- On the top right corner, there is a symbol containing a star in the middle. This is the ‘Admin Tools’ section.
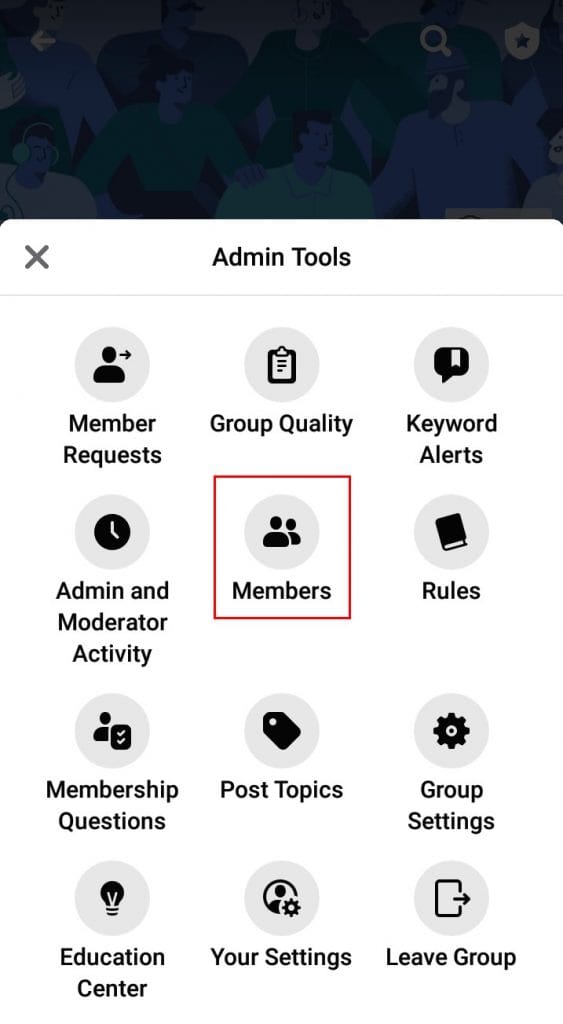
- Here, from the ‘Members’ section, remove all the people that are a part of the group, one by one. If it is a large group, you will have to allocate a whole lot of time to do this, as there is no option to remove all the members at once.
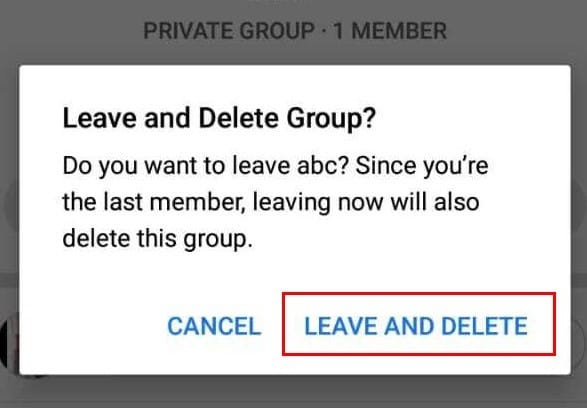
- Come back to the Admin Tools section. In the last, there is a button indicating ‘Leave Group’. A popup will appear asking for your confirmation. Click on ‘Leave and Delete’, and the Facebook group will be deleted.
Note:
- If you did not remove all the members, leaving the group will result in the transfer of admin rights and the group will continue to exist. If you do not receive the above message of ‘Leave and delete’ when you are leaving the group, that would mean you have not removed all the members.
- Alternatively, if you do not want to delete the Facebook group completely, you can even archive it. Group admins can archive a group, meaning that the group will no longer be seen in Facebook search to non-members, and no new members can join it.
- Group owners can delete Facebook groups, whereas group admins can only archive it (unless the owner leaves).
Delete a Facebook group from your desktop when you are the admin
- Login to your Facebook account by going to Facebook’s website (https://www.facebook.com). This will load your News Feed if you are already logged in. (If not, enter your email address or phone number and password to log in)
- On the home page itself, on the left-hand side, there is a panel. In the ‘Explore’ section, you will see ‘Groups’. From here, you can access all your groups on Facebook.
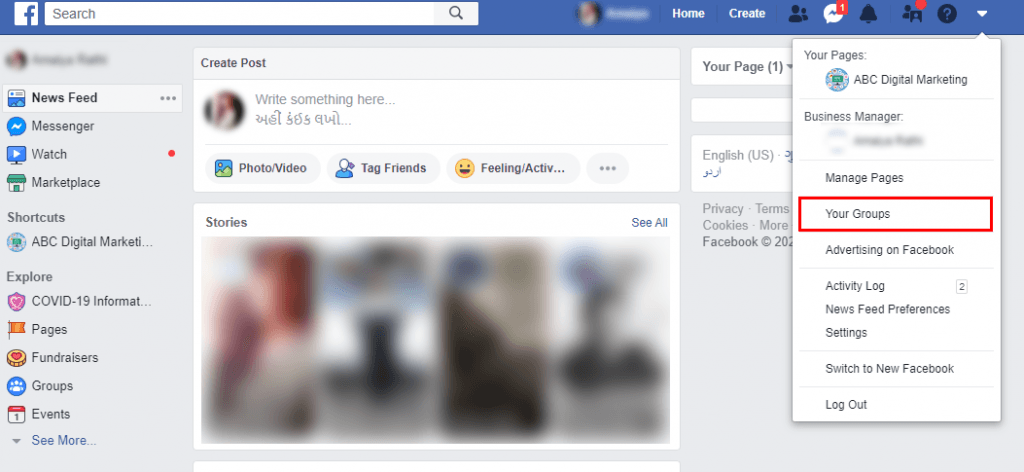
Alternatively, you can also go to the ‘Groups’ section by clicking on the inverted triangle symbol on the top right corner in the menu bar. A drop-down menu will appear, from which you need to select ‘Your Groups’.
- Now, again on the left-hand side, you can see a list of all the groups in which you are a member.
- Select the Facebook group that you wish to delete (in which you are the admin).
- Navigate to ‘Members’ on the left side of the page and you will see the list of people who are added in the group.
- Next to each member’s name, there will be a ‘more’ button. Click on it and select ‘Remove from group’. Remove every member from the group by repeating the same process.
- Now, you will be the only person left. So select the more button next to your name and click on ‘leave group’. A pop-up notification will ask for your confirmation. Hit “Leave and delete”.
Note:
Do you want free access to more Facebook post clicks, likes, comments, or reactions? Who wouldn’t, I guess?
When you are not the owner of group
When you are not the admin and simply want to leave, select the group and click on the three dots that appear on the right-hand upper corner (when you are using a phone). A menu will appear from which you can select ‘Leave Group’ and confirm.
Is your Business/Company’s Group not working and you want to delete it?
Facebook groups for business can prove to be an asset for your business marketing, but they don’t always work out the way you plan. If you have a large membership, it can be time-consuming. The groups should contribute to a specific business goal, otherwise, there is no reason to keep them running.
Deleting the group is the final step. There is no going back once you have deleted it – all your work will be gone for good. You will lose all the connections that you have made. So before you delete your Facebook group, consider other options.
1. Change the group’s branding and name
Consider re-branding the group. It might work. It can be a bit demotivating when you build a group with a lot of engagement, but the members still recommend your competitors in the comments.
Do the people clearly know that your business owns the group? If not, re-brand. Change the group’s name, add branding to the cover image, and link your Facebook page to the group. Even you must know some of the Facebook publishing tools so that whenever you need something, you can take a guide from that tool or you can use them.
2. Make the group more active by adding admins
If your group has a high engagement rate and people are friendly and comfortable with each other, deleting it is not a good option. It might hurt their feelings and also damage your reputation.
Look for some active members in the group and approach them to take over as admins. If you do not want to spend time and stay active, change the name of the group, let members know about the change, and pin a message to the group that welcomes new admins.
This way, you will still remain the owner and your group will still be active without your supervision. You can see how to schedule posts on Facebook groups so that you can keep your group members updated all the time even without being actually logging in every day.
3. Archive the group
This action is reversible, unlike deleting the group. Archived groups remain intact with all the engaging posts and conversations available for members to see. It will just no longer appear in the search results for non-members. New members also cannot join the group in this case.
This is a good option when you do not have much time to invest in the group and are busy with other things. Also, if there is any content or post that is helpful to you in the group – it can be accessed anytime.
Whenever you change your mind and want to make the group active again, you can un-archive it.
Tidying Up
It is good to say goodbye to things that no longer serve you! And Facebook groups can be one of them. Cleaning them out can feel purgative and you can ensure that you will not have to monitor any group activity. However, weigh your options before you delete a Facebook group. And if you choose to delete it, take note of the things that you discovered from running the group.
Frequently Asked Question
Here’s how you could delete a group on Facebook:
– Log in: Open Facebook and sign in.
– Find Group: Search for or go to the group you want to delete.
– Menu: Click the three dots below the group cover photo.
– Settings: Choose “Group settings” from the menu.
– Scroll Down: Go to the bottom of the settings page.
– Delete Group: Click “Delete Group.”
– Confirm: Agree that you want to delete it.
– Password: Type your password.
– Final Confirm: Click “Confirm” to finish deleting.
Here are steps to delete a groups on Facebook:
– Log in: Open Facebook and sign in.
– Find Group: Search for or go to the group you want to delete.
– Settings: Click the three dots below the group photo, then choose “Group settings.”
– Delete Group: Scroll down and click “Delete Group.”
– Confirm: Agree to delete and enter your password.
– Final Confirm: Click “Confirm” to finish deleting.
This was you can delete group in Facebook.
To remove a Facebook groups, follow these simple steps:
– Log in: Open Facebook and sign in.
– Locate Group: Find the group you want to leave.
– Options: Click the three dots next to the group’s name.
– Leave Group: Select “Leave Group” from the options.
– Confirmation: Confirm that you want to leave the group.
– Done: You’ve now left the group.
Facebook does not provide an option for group creators or admins to delete a group while keeping the members in the group. If you want to close or delete a group, it typically involves removing all members and then deleting the group. This is because groups are primarily intended for interactions among members, and removing all members indicates that the group’s purpose is no longer relevant.
To delete group on Facebook, follow these steps:
– Log in: Open Facebook and sign in.
– Find Group: Locate the group you want to delete.
– Settings: Click the three dots below the group cover photo, then pick “Group settings.”
– Delete Group: Scroll down, and select “Delete Group.”
– Confirm: Agree to delete, and type your password.
– Final Confirm: Click “Confirm” to finish deleting.
To delete a group you made, follow these steps:
– Log in: Open Facebook and sign in.
– Access Group: Go to the group you created.
– Settings: Click the three dots below the cover photo, then choose “Group settings.”
– Delete Group: Scroll down and select “Delete Group.”
– Confirmation: Confirm the deletion and enter your password.
– Final Confirm: Click “Confirm” to delete the group.
The answer is no, if you delete a post in a Facebook group, the person who originally posted the content will not receive a notification about its deletion. The post will simply be removed from the group’s feed, and other group members won’t see it anymore either. However, keep in mind that group members might notice the absence of the post if they had seen it before it was deleted.
Facebook doesn’t provide a built-in feature to delete all groups at once. Deleting groups individually is the typical approach. If you’re a member of numerous groups and want to leave all of them, you would need to do it manually for each group.
If you want to delete a Facebook group that has thousands of members, start by making a post to inform members about the group’s upcoming deletion. Give them time to save anything important. If you want to keep group content, download it using Facebook’s data download tool. Once members have had time to react, follow the steps to delete the group. Make one last reminder post before you delete it, ensuring that everyone has a chance to prepare for the group’s closure. This approach shows consideration for your group’s members and helps them transition smoothly.
To delete a private Facebook group, log in, find the group, click the three dots, choose “Group settings,” scroll and select “Delete Group,” confirm with your password, then click “Confirm.” Remember, this is permanent, so be sure before you proceed.

Amaiya Rathi is a Senior Content Writer at RecurPost. She helps RecurPost communicate with their readers in their own language. Whether it is the web copy, social media posts or blogs, Amaiya has worked on all aspects of copywriting. You can reach out to her at [email protected].